
Python in Mari – Part 3: Some Guessing Required, Some Snooping Required

Introduction
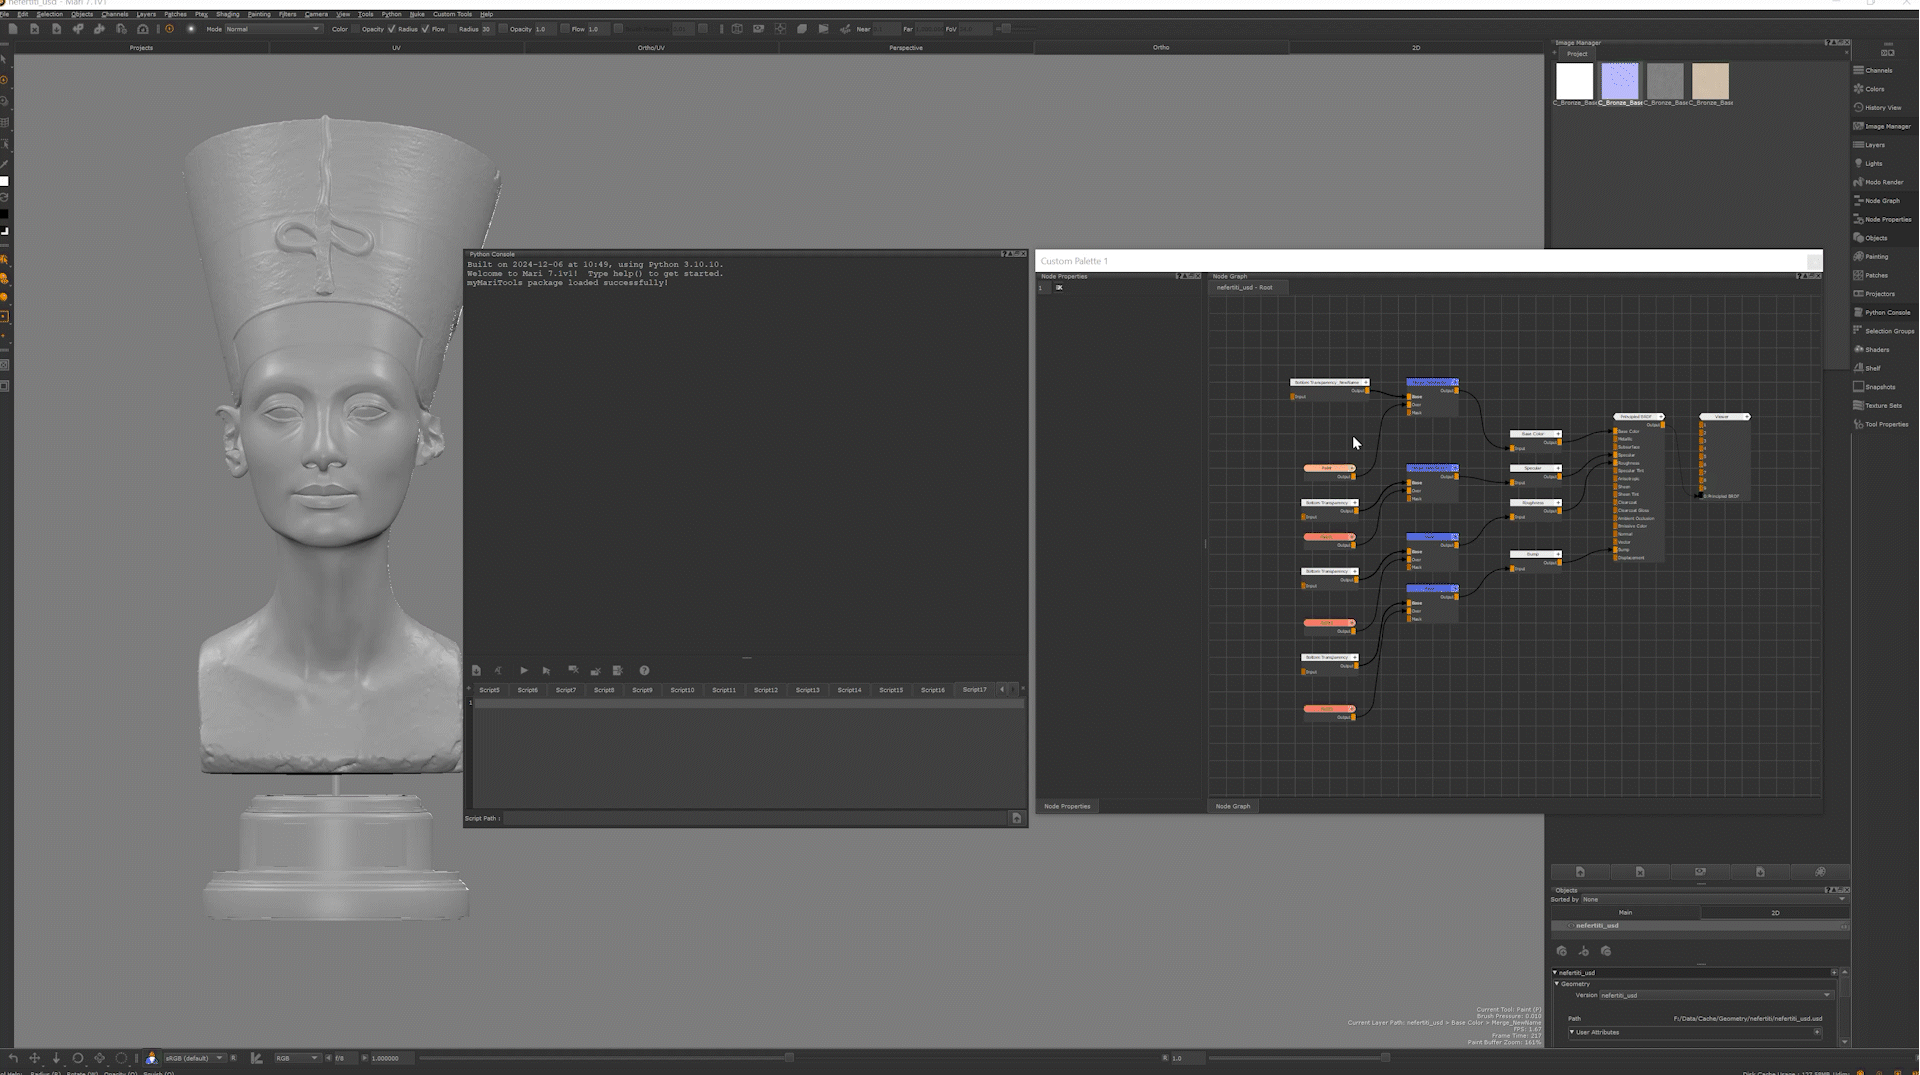
Alright, this might feel like a side quest, but it’s totally in the spirit of our last mission — taming the chaos in Mari’s Node Editor – kinda.
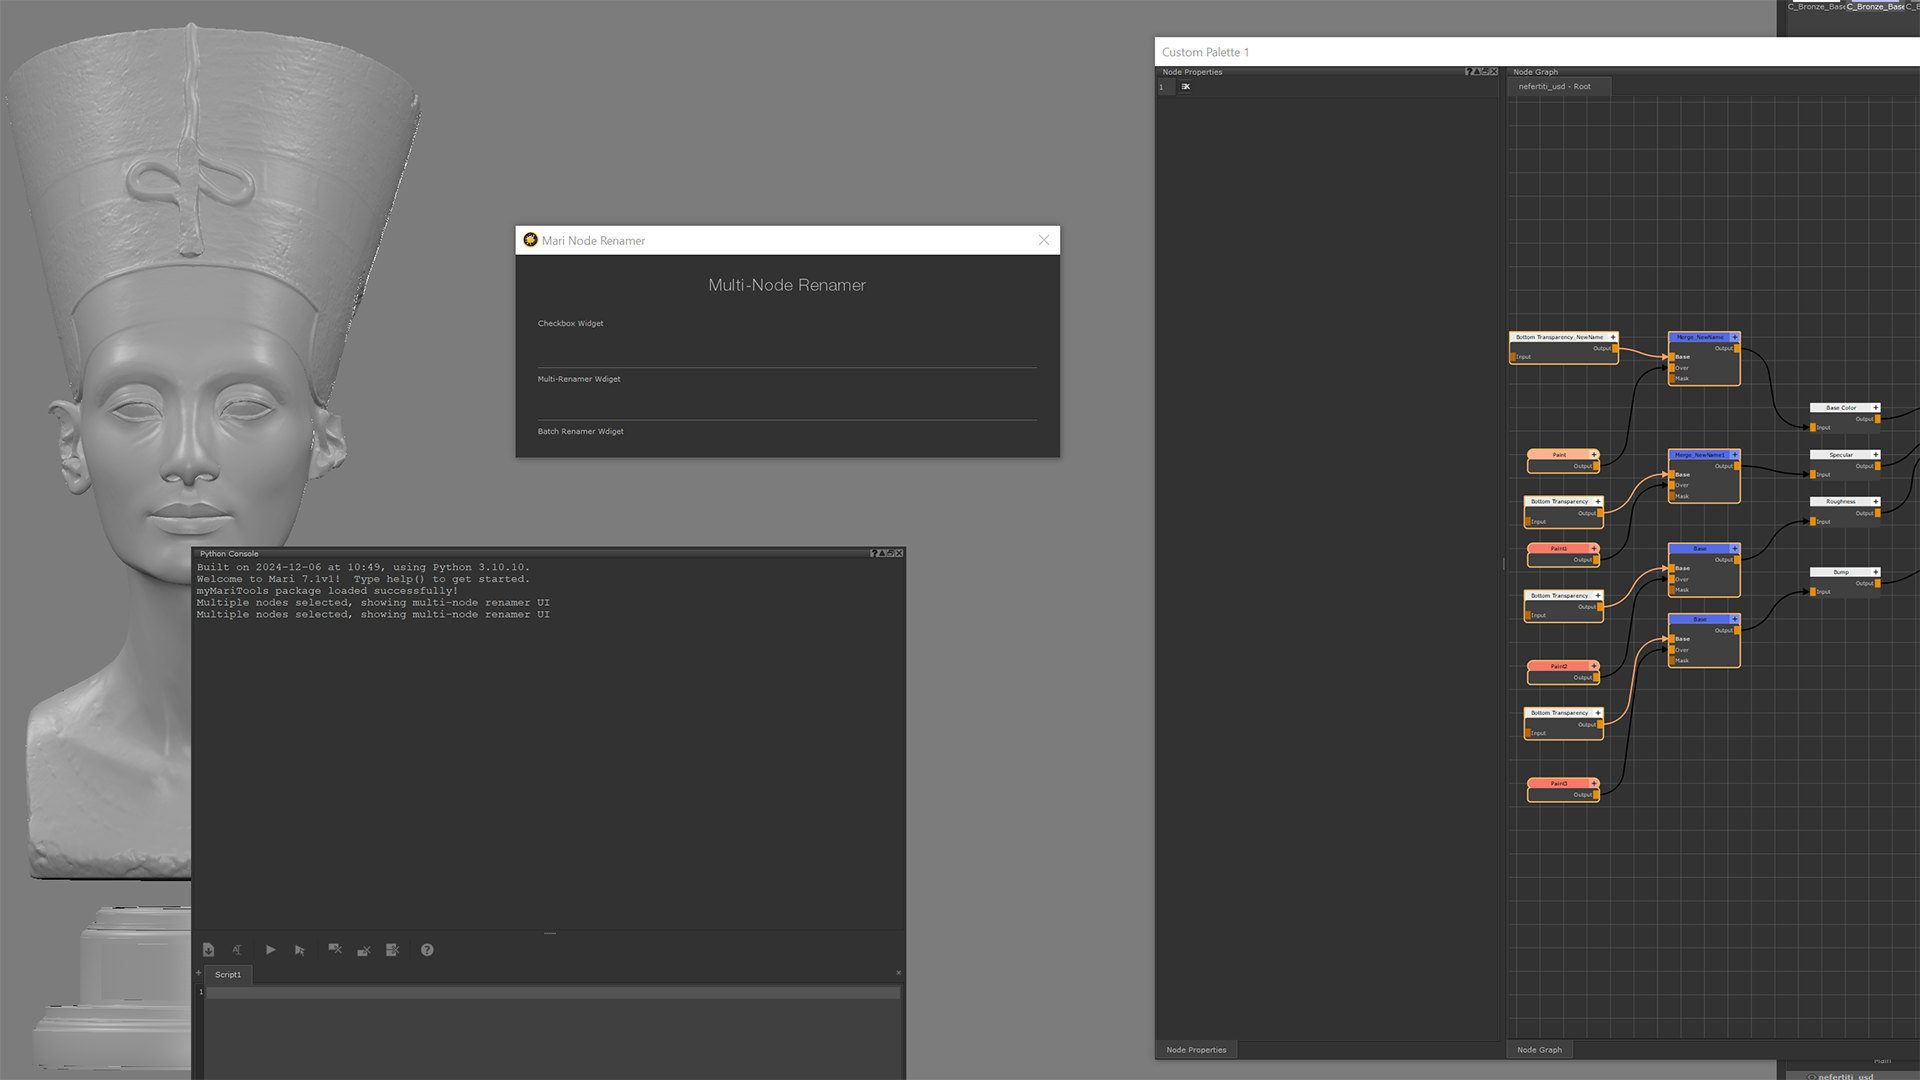
What the goal of this here exercise, besides giving myself a headache? Select a node in the Mari Node Editor, hit a keyboard shortcut, and boom a cool little pop-up appears letting you rename that node right there. No pop-up? That just means you forgot to select a node. Simple. But I am pretty sure by the end of this I will have found more creative ways to complicate this exercise..
My plan? Figure it out live, armed with the docs, Google, and, of course, AI. Because let’s be honest — AI isn’t going anywhere. Luckily, it still can’t paint my characters textures (yet), so my job is safe for now, I hope.
Spoiler Alert
In this case, AI was not quite the hero, at least when it came to figuring out how to get stuff done in Mari. See, AI is fantastic at trawling through massive piles of information and stitching together mostly accurate answers. But catch here is — there needs to be enough correct, reliable information out there in the first place. When the pool is relatively small? It starts guessing. So in creating the UI, AI was helpful, but in some niche topics like Python in Mari, it was guessing a lot.
Case in point: I got AI suggesting commands and modules that simply don’t exist, and approaches that don’t even fit the problem. It wasn’t malicious — just… making things up because there wasn’t enough to go on.
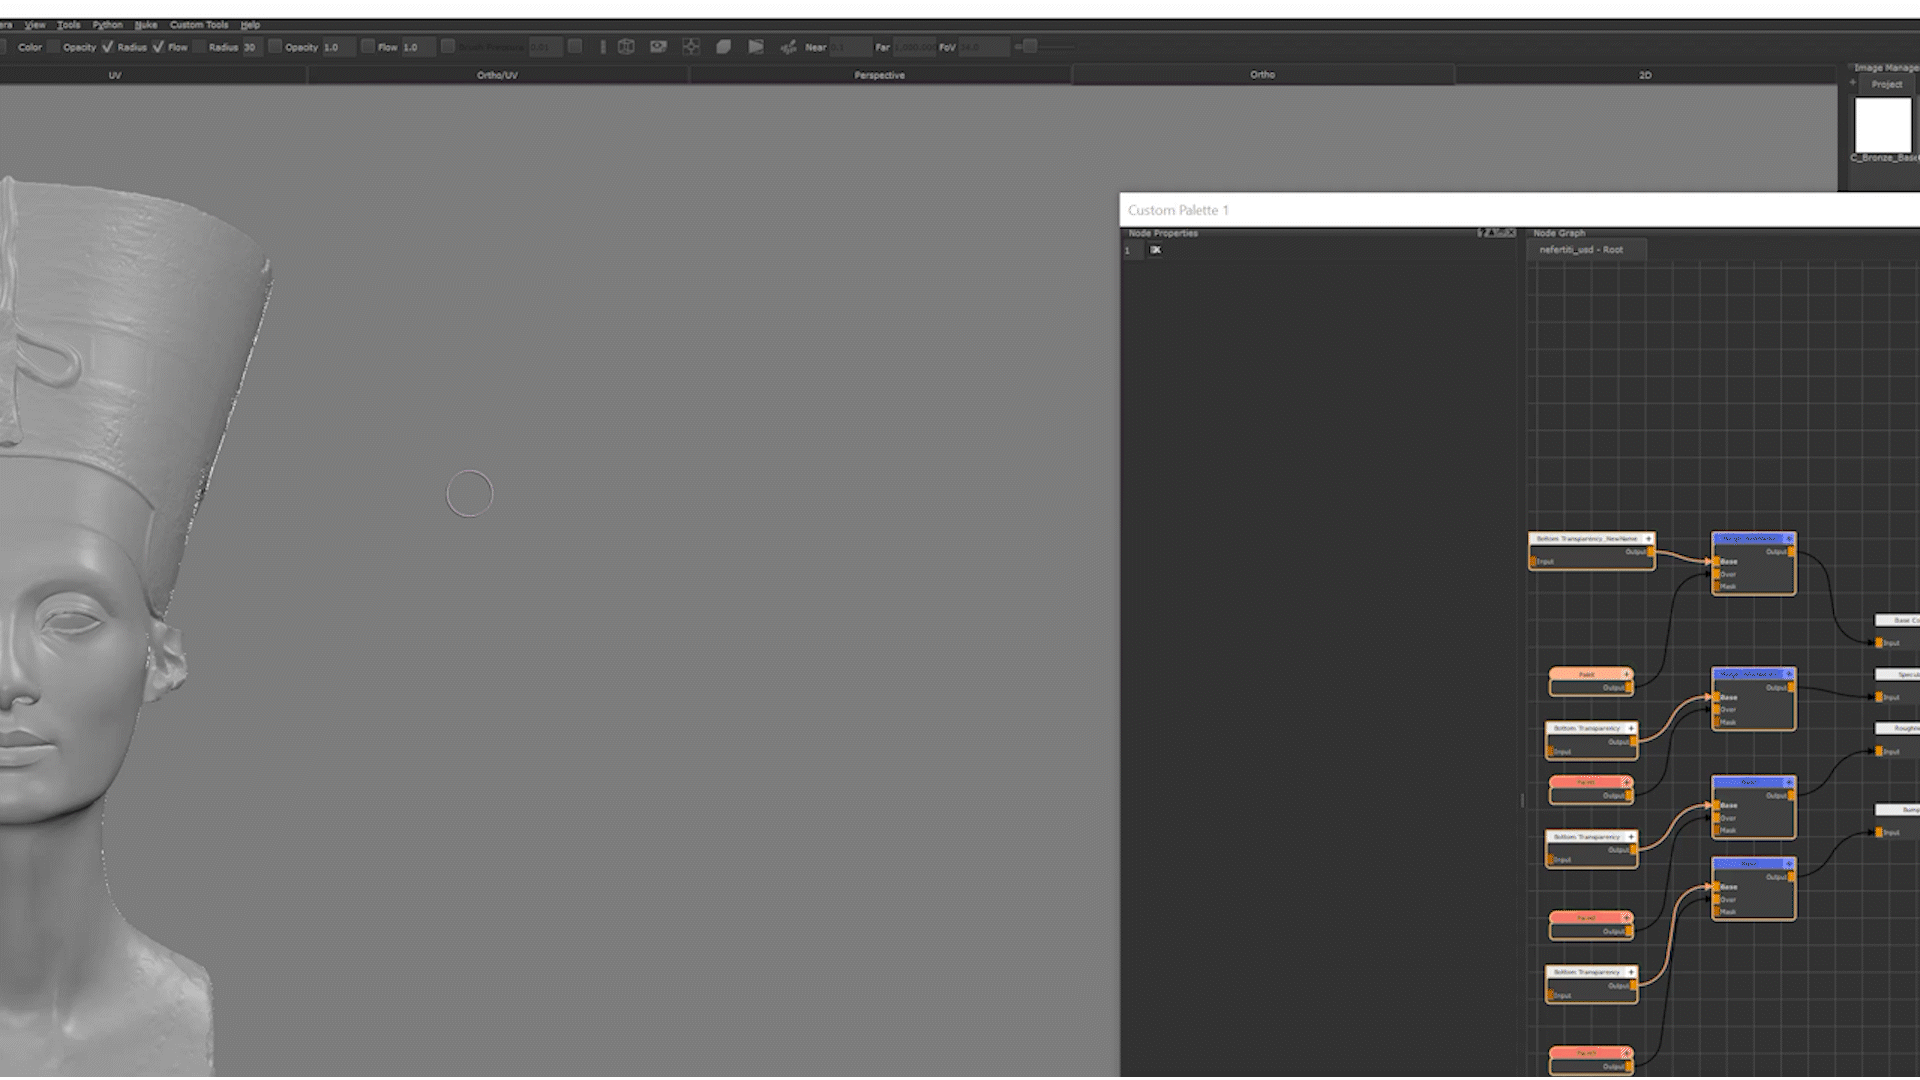
Ironically, the most helpful resource wasn’t the official documentation (which, for me, might as well have been written in Russian). No — the real goldmine was Mari’s own Python code in its install directory, plus the included example files.
Using a code editor like PyCharm with amazing search tools to look for methods and attributes across multiple files and folders was really helpful and would absolutely recommend.
1. Selected Nodes?
I guess the first thing is to grab a list of the selected nodes from the node graph — and make sure we output a log error message if nothing is selected. Later I will change this to a message that will alert the user, (me) when there are no nodes selected.
In the Python Console:
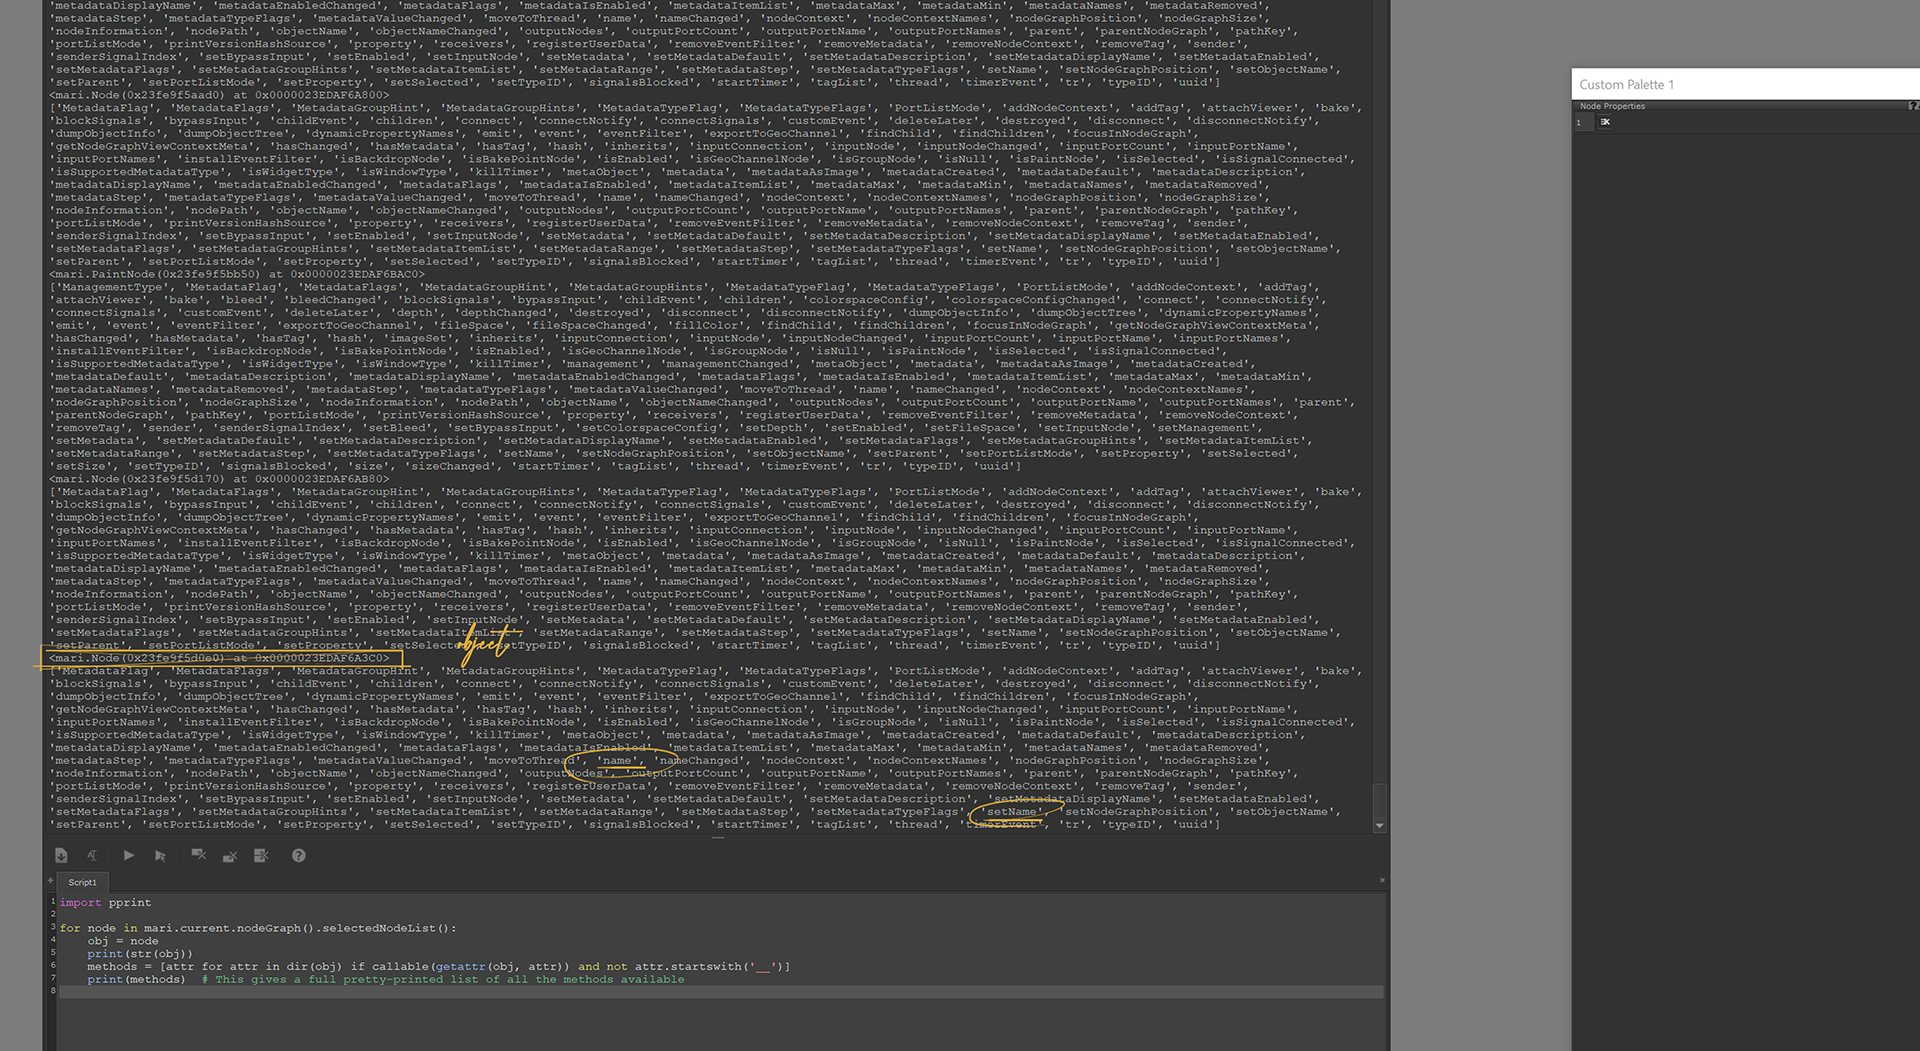
This will print out a node object, because a node is an object and I don’t yet know what attributes or methods that object has.
So, I’ll tweak the script to find out:
This gives me a list of methods available for the node object.
OK, there is a .name() method to get the node’s name — halfway there!
And then… oh look, there’s a .setName() method.
Great!
Naturally, the next thing I tried was using that .setName() method. Comment out some of the code we don’t need (for now – might need this to inspect other objects down the line) and set the name for node.
Here’s the simplest version:
Of course, now all the selected nodes have the same name, Mari doesn’t appear to mind if you give multiple nodes the same name but I do! — a problem we’ll fix in the next step.
Mari will happily let you give several nodes the same name, which isn’t great for keeping track of things. So, before renaming, I need to check if my chosen name already exists in the node graph.
First I need to get a list of all the nodes in the graph. To do this I need to “get” the currently active nodegraph.
In Mari API, mari.current.nodeGraph() “offers functionalities to traverse the Node Graph, identify specific nodes, and query their connections” and sounds like exactly what I need to get a list of all the nodes in the nodegraph.
The nodeGraph object has a .nodeList() method that does exactly that:
The dir() is how I spotted .nodeList() in the first place.
Once I have all the nodes, I can build an array of their names for quick lookups:
This gives me a handy list of every node name in the graph, which I can now check before renaming anything.
Now that I have a full list of existing node names, I can make my renaming script a little smarter. I can check if my chosen name already exists, and if it does, automatically append a number to keep things unique.
Alright — the auto-numbering works nicely, but I think I can do better.
Wouldn’t be great if my new name actually hinted at what kind of node it is? That way, just looking at the name tells me more about the node and its purpose in the graph. OK, maybe that last part is a bit of a stretch, but certainly about the kind of node, I can definitely do.
A quick bit of “snooping” gave me some interesting leads:
That second one, node.nodePath(), looks promising — if I split the string on /, the last item in the resulting list is basically a readable node type name.
Here’s the updated script:
Now my renamed nodes aren’t just unique — they’re also self-descriptive, kinda…
For example, a Channel node would end up with something like Channel_NewName or Channel_NewName1 if the first name is taken.
2. Its Qt Time
I’m going to put a pin in this for now to work on a UI.
I need a popup window that asks the user for the new name to apply to the selected node(s). That means we’re officially stepping into PySide / PyQt development territory inside Mari.
Tea break required.
Alright, so real quick so we’re on the same page, this is my folder structure:
I cover this folder structure and how I set up my python environment in my Python in Mari – Part 1: Automating Some Stuff (Without Losing Your Mind) post.
Inside myTools, I’ll create a file called myNodeRenamer.py, which I’ll trigger with the shortcut CTRL+SHIFT+R (you can check my earlier post for how to set up custom commands and shortcuts in Mari).
I’ll then fire up Qt Designer to create a basic UI layout. After that, I’ll export the UI to Python code and integrate it into my Mari tool, so the popup works seamlessly.
To get things started I’ll just perform a quick sanity check: In myNodeRenamer.py I have:
2.1. Previously On… Mari Python
In hello_mari.py I have: (There is more in this file, but this is the part that is relevant that will call on the myNodeRenamer.py script – I cover a lot of this in Part 1)
What this does:
- Adds a “My Node Renamer” menu item to the main menu under Custom Tools
- Assigns it the shortcut
CTRL+SHIFT+R - When triggered, it reloads
myRenamer.pyand runs theidentify()function, which simply prints :Hello. This is Mari Node Renamer
Nice and simple — a clean hook to our custom tool.
2.2. Moving On… Starting the UI
First, I need to query Mari’s main window so my new Renamer window knows what to attach itself to. This ensures it behaves like a proper child window rather than a floating orphan.
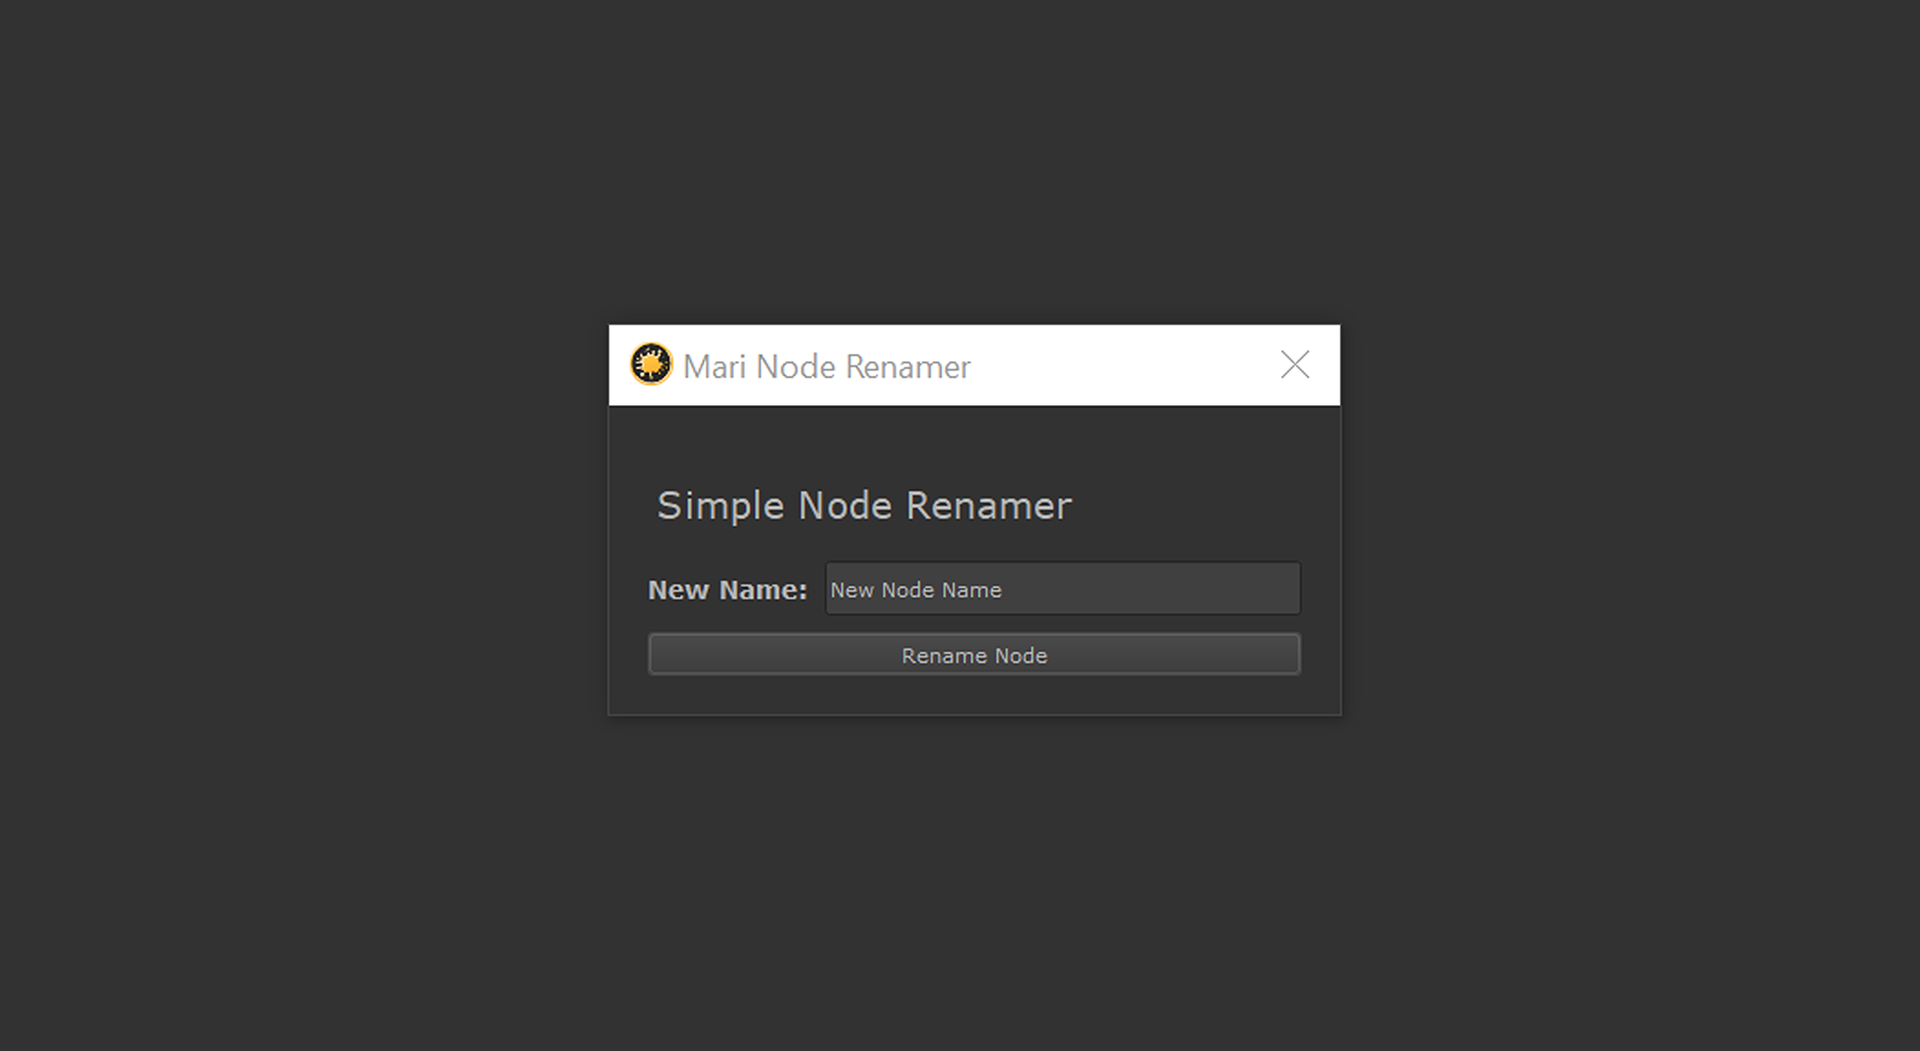
Then I create my Renamer Window — give it a title and make it visible:
- We inherit from
QDialogso it acts like a pop-up tool window. parentis set to Mari’s main window so it stays on top and closes with Mari..setWindowTitle()gives it the name you’ll see in the title bar.
Now we build the UI (for now, it’s just an empty dialog):
Using global win means we can keep a reference to the window so Python doesn’t garbage-collect it immediately after showing it.
Finally, we need to make sure this runs instead of just printing:
In hello_mari.py, change:
to:
Now I’m going to create the UI inside myRenamer.py. This is where Qt Designer comes in to design the popup, export it as Python, and then integrate it so Mari displays a nice dialog when we press the shortcut.
Hit CTRL+SHIFT+R and voila — a new blank window named Mari Node Renamer appears.
One last tweak — I want this window to open only if there’s a Mari project loaded. After all, you can’t rename nodes if there are no nodes to rename, right?
We can add a quick check inside run() like:
That way, the UI won’t even open unless there’s something to work on.
These two lines basically do the same thing so you don’t need both.
Code Check
So now, here is where we are at:
2.2. Let’s delve in a little deeper
When one is in Egypt,
one should delve deeply into its treasures!
James Bond, The Spy Who Loved Me
2.2.1 Name your shit!!
Now, if there’s one thing I’ve learned in all my CGI travels and adventures, it’s this: naming stuff makes your life waaayyy easier. Better yet, having consistent naming methods will save you time, energy, and probably a good chunk of your hair!
For me, this becomes super important when building a UI. Since UI building is mostly coding (not visual until you run it), it’s very easy to get lost in layouts, dialogs, and widgets. (As I certainly did during this little adventure).
That’s why I name everything — even the spacers and separator lines.
Yes… even the invisible stuff gets a name in my projects.
Here’s the basic UI I’m going to create — nothing fancy, no drama.
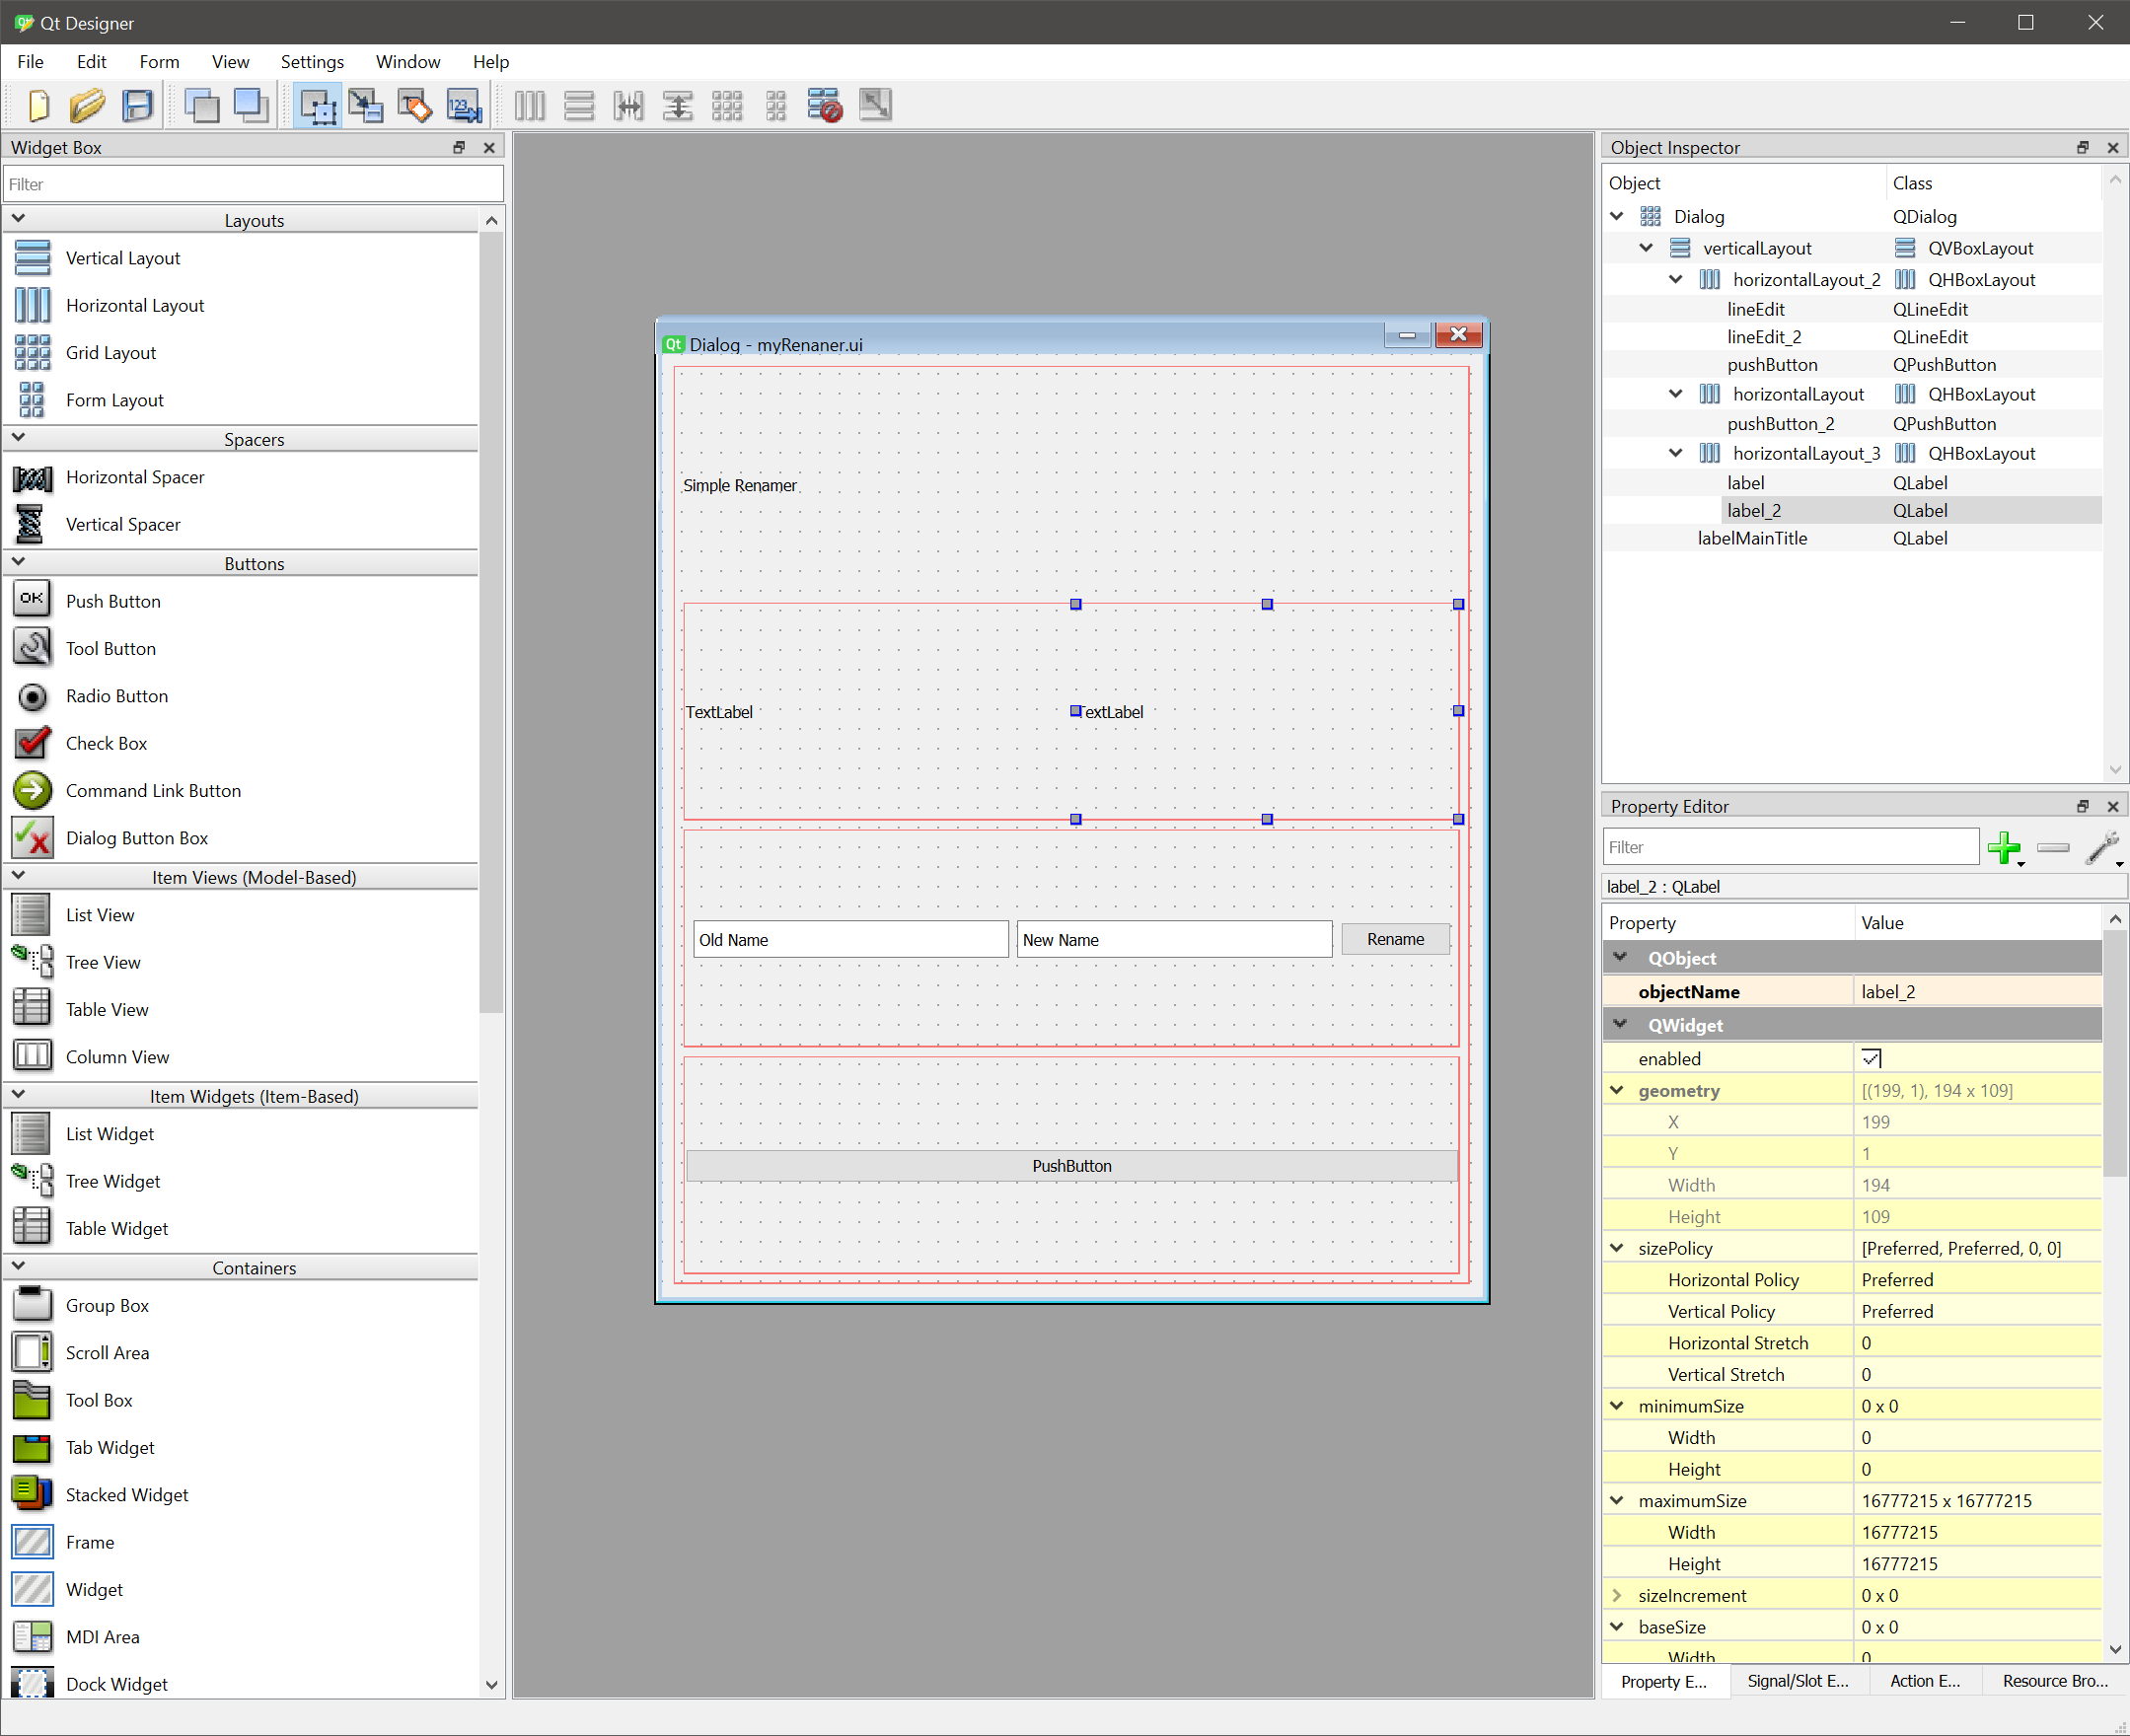
Starting with a grid layout, Inside the class, I’ll add this:
Code Snippets
I’ll try to show the previous line of code from the previous step so that, if you are following along, you don’t get lost. I’ll indicate this with #...
I’ll also mention where I am at in my code, as I can sometimes tend to jump from one point to another, and sometimes my brain does that.
From time to time, I’ll show where I’m at with a code check!
Also, pay attention to tabs and spaces.
At this stage, the window is still empty. All this does is create the layout structure — an invisible grid, with one vertical layout sitting inside it.
Think of it like ordering a pizza and only getting the box. The boda guy swears the toppings are coming later… but for now, it’s just you and the box, and maybe the dough.
I’m building this UI from the inside-out… well, technically from the outside-in.
Right after:
And before:
I’ll add my first child layout:
What I’ve done here is create a horizontal layout (hl_title) to hold a single label — our “Simple Node Renamer” title. Then dropped that horizontal layout inside the main vertical layout.
A final warning before I go further
If you’re not careful, this can quickly turn into that a dream within a dream and you’re three dreams deep and you can’t remember which end is up. You’ll have layouts inside layouts inside layouts… and your brain will start to feel like an M.C. Escher staircase.
To avoid this, I keep track of what I’m adding and where in two ways:
- Clear naming — Prefix each layout/widget with its type (
vl_for vertical layout,hl_for horizontal layout,label_for labels, etc.). That way, even at 3AM, you’ll know whathl_titleis. - Comment breadcrumbs — Little comments in the code showing the hierarchy:
2.2.2 Hope I’m not loosing you, chief?
Good — because I just snuck in some housekeeping code into the class RenamerUI() for a little style and other prep work. Can you guess what it is?
Basically, I’ve started laying the foundations for consistent styling later on — without actually committing to any particular look right now. It’s like preheating the oven before I get the potatoes in there…
So, what’s new here?
Minimum Width
Keeping things comfortable and prevents our UI from turning into an unreadable jumble when resized. I can always change this later in the code.
Style Tracking Lists
These are collections to keep track of certain widgets (titles and labels) so we can style them all at once later.
Instead of trying to hunt them down in 200+ lines of code, I’ve got better things to do!
Example:
I have then added the Title and Labels to their respective tracking lists. Future me is grateful!
Setting Defaults
Right now, setDefaults() is giving our titles and labels a little styling:
- Titles →
font-size: 20px; - Labels →
font-weight: bold; font-size: 14px;
…but it’s capable of way more than just dress code enforcement.
This is also where you can:
- Set placeholder text in input fields:
- Pre-fill defaults so common actions are ready to go:
- Toggle initial widget states like disabling a button or checkbox until certain conditions are met:
- Load user preferences (if you’ve saved them somewhere) so the UI always opens just how the user left it last time.
In other words, this method is your UI presets hub — style, content, interactivity, everything. By centralizing it here, you avoid having “magic numbers” and random defaults scattered throughout your code.
When future you decides to change “geo_” to “mesh_”, you’ll know exactly where to go.
No code treasure hunt required.
3. One Small Step for a Node…
Now that my window is popping and the title is title-ing it’s time to give my first node a brand-spanking-new name. This is the baby step before we unleash the big multi-node rename madness.
Here’s the plan:
- User (me) selects a node (just one for now – let’s not get ahead of ourselves).
- Hit
CTRL+SHIFT+R(or select the command from my custom menu) - The rename window appears, asking what new name this node shall have.
- User types it in, presses Enter (or clicks a Rename Button), and — ta-da! — the node is reborn (not really, its renamed, I’m being dramatic).
But before I get carried away… again, I also need to make sure:
- That there is at least one node selected. If not, we don’t even bother popping up the rename UI.
- That only one node is selected — because this is our starting point.
Think of it as checking that the guest list has exactly one person before we start the party, and that person is not that person. No guests? No party. Too many? That’s for the next chapter… hehehehe!
3.1 . Check Yourself Before You Rename Yourself
Right after self.vl_renamer.addLayout(self.hl_title), I am adding a quick sanity check, just to make sure I am not renaming thin air…is it really air though? I think Morpheus may have some ideas.
What’s happening here:
self.selectedNodeList = self.selectedNodeList()
Yes, I know — it looks like I’m talking to myself. On the right-hand side, I’m calling the methodselectedNodeList()that I’ll define in a moment; on the left-hand side, I’m storing the result in a variable of the same name. Python’s cool with this… as long as you keep your tabs straight.if not self.selectedNodeList:
This is my “do I even have anything to rename?” moment. If there’s nothing selected, we bail early.QMessageBox.warning(...)
This pops up a friendly-but-firm message telling the user to actually select something before trying to rename it.if len(self.selectedNodeList) == 1:(...)
Checks that we actually only have one node selected and returns and error if not.Eventually, thisif/elsewill evolve into the decision point for which interface to show:- Single node selected? → Launch the Single Renamer UI
- Multiple nodes selected? → Launch the Multi-Node Renamer UI
Right now it’s just a guardrail with a print and a warning, but it’s the perfect spot to hook in our two different workflows later – again I am getting ahead of myself..
And here’s the method that does the actual node gathering:
This just asks Mari, “Hey, who’s highlighted in the node graph right now?” and passes that list back. I have placed this method after the setDefaults() method.
3.2 . Pushing Buttons That Don’t Work (Yet)
Since I’ve confirmed there’s only one selected node, I can go ahead and create a neat little UI panel for renaming it.
This panel will have:
- A label telling the user what to do (“New Name:”)
- A text box where they can type the new node name
- A button that says “Rename Node” — even though, for now, clicking it does absolutely nothing.
Here’s what’s going on in the code:
- Checking if exactly one node is selected → If yes, we build the single-node rename UI.
- Setting the window width → A nice, comfortable
400pixels wide. No need for the extra real-estate. - Creating a horizontal layout for the label and text box side-by-side.
- Adding the label
"New Name:"and tracking it inself.uiLabels(useful because I want to style or update labels later). - Adding a QLineEdit with default text
"New Node Name"so the user knows what to type here. - Creating another horizontal layout for the “Rename Node” button and adding it to our main vertical layout.
- Actually adding said button details in bio!
Important
I’ve tried to not skip over proper indentation in this example while explaining my thought process as best I can, however sometimes spaces and tabs can get lost when translating onto the post, but if you’re following along, keep your tabs and spaces exactly where they should be. Upset indentation means upset Python. And upset Python means Mari will look at you in silent judgment.
Final Warning!
3.3.1 . Single Rename Form
When the user clicks this button, I need to pass two things to our renameSingleNode method:
- The selected node object — the actual Mari node we want to rename.
- The field object — in this case,
lineEdit_singleNode, where the user typed the new name.
Note: The QLineEdit object itself is not the text! I’ve fallen into this trap many-a-time! It’s just the widget object. To get the actual user input, you’ll still need to call .text() on it later.
This is one of those moments where giving your variables clear, specific names saves your sanity — seriously, future you will thank you.
Here’s what the connection looks like in code:
Why functools.partial?
functools.partial?“Wait… why not just connect(self.renameSingleNode)?”
We use functools.partial because clicked.connect() can only pass parameters if we wrap our method call. Without it, PyQt would only send the click event object — which isn’t enough for us. With partial, we can pre-fill the method’s parameters so that when the user clicks the button, it’s called with the exact arguments we need.
Now that we’ve wired up the button, it’s time to create the actual method that does the renaming.
Inside the class, we start simple:
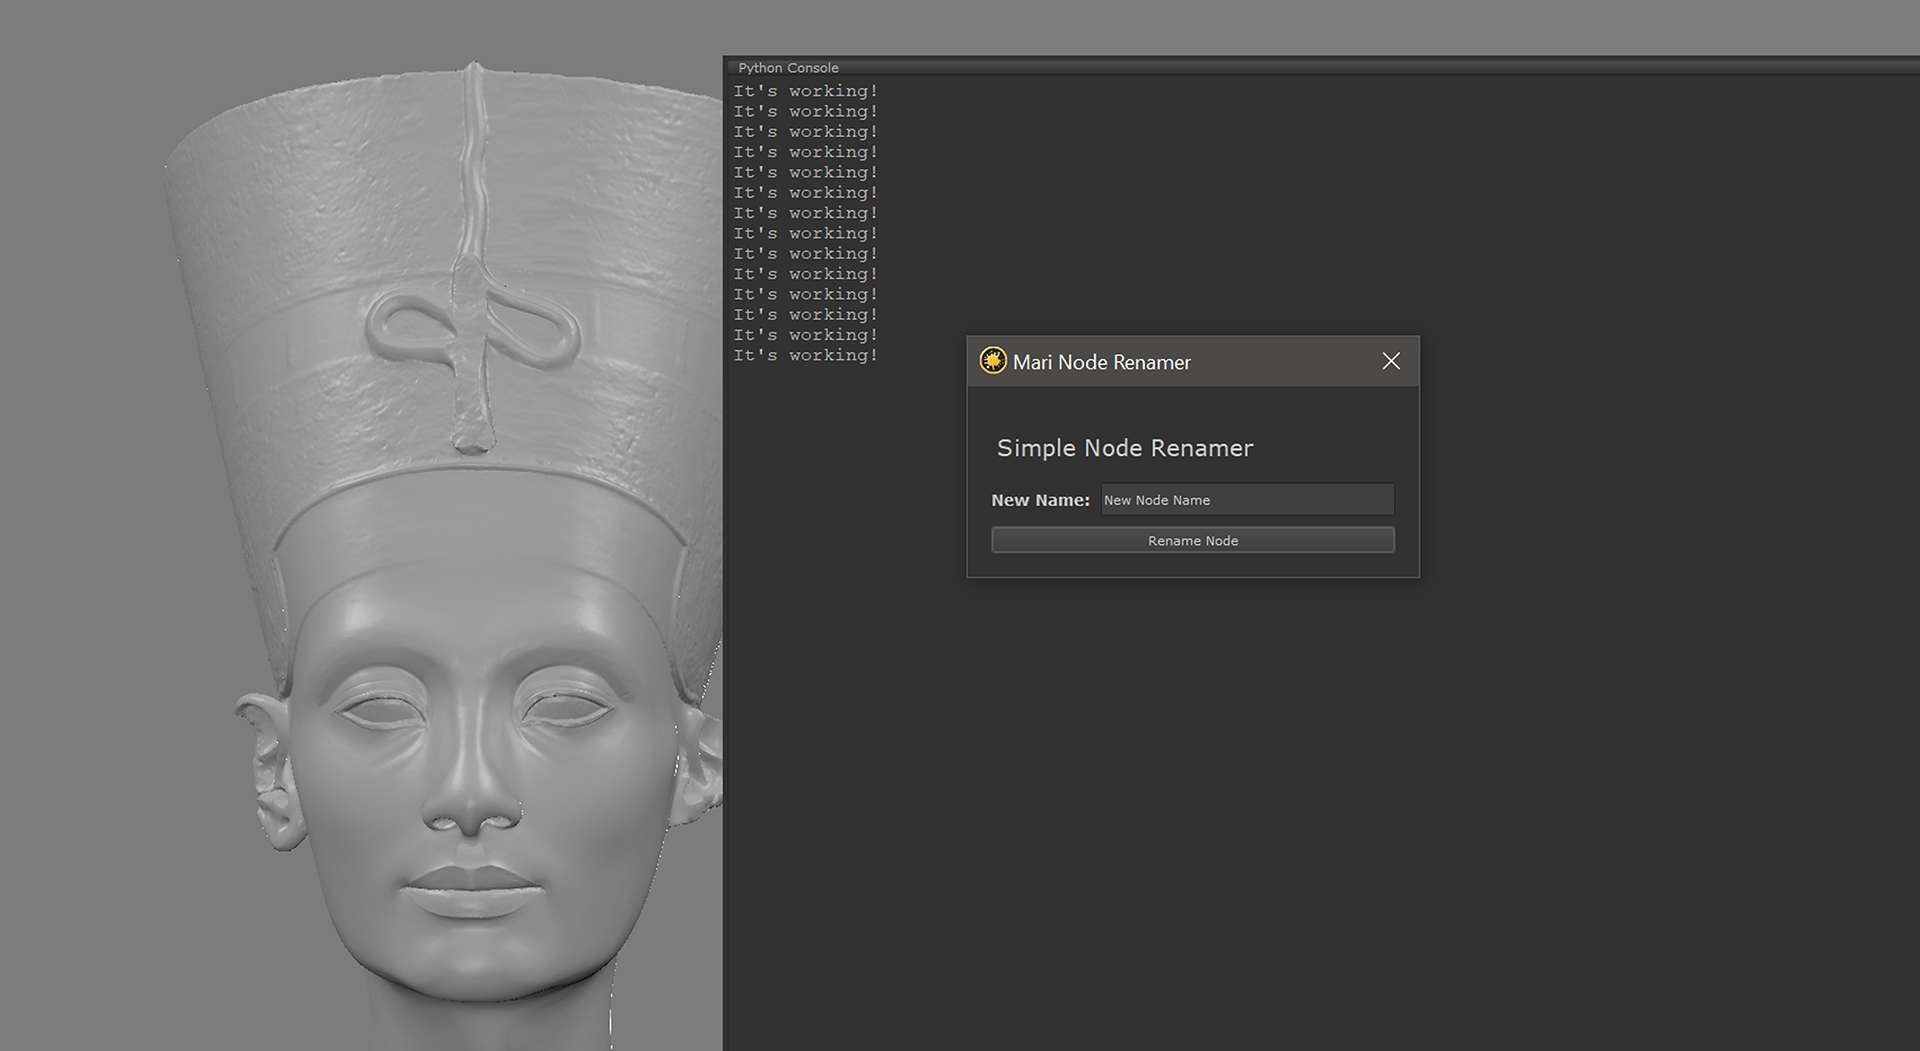
At this stage, the renameSingleNode method doesn’t do much yet — just prints a message so we know the button is correctly hooked up.
That “sanity check” print is my buddy while testing. If I don’t see it in the console after clicking the button, something’s wrong in your connection logic, or I messed up in my reporting…
Why use None as defaults?
None as defaults?I pass node=None and fieldName=None to make the function more flexible and safer:
- If the method is called directly (say, for testing), Python won’t immediately throw an error for missing arguments.
- It acts as a “placeholder” until we pass in the actual values via
functools.partial. - It gives you a nice way to check later on if arguments were actually provided (e.g.,
if node is None:→ handle gracefully).
In short: None is a safe default that prevents your method from exploding if called without parameters — a tiny detail that can save you a debugging headache later.
3.3 . Rename It!
Yes, I know — it feels like I’m dragging this out. But the truth is, you can’t just grab the user’s input and slam it onto the node. Mari can be a bit picky, and you’ll save yourself hours of headaches by validating the name before committing to it.
Let’s break this down step by step:
3.3.1. Get the user’s input
The first step is to pull the text from the QLineEdit:
Note: Recall earlier when I said the field was just an object, not the text?
This is where .text() comes in — it extracts the actual string the user typed.
3.3.2. Clean up the string
I want to avoid ugly surprises, so normalize the name:
3.3.3. Ban special characters
❌ Examples of things Mari will reject:
Base-Color!my nodealbedo@v2
✅ Valid names:
base_colordiffuse1
3.3.4. Protect system nodes
Some nodes should never be renamed. For instance, I don’t see why I would ever want to rename the Viewer node:
If I find others that I don’t think I should be renaming, I will add them to this condition, but I can’t think of any other at the moment.
3.3.5. Handle empty input
What if the user didn’t type anything at all? That’s not a name, that’s a blank stare.
3.3.6. Prevent duplicate names
Even after cleaning, the name might already exist in the Node Graph. Renaming two nodes to the same name defeats the whole purpose of this exercise.
So, I’ll first create a list of all existing node names – If you are fancy, you can do this all-in-one line, like:
OR, you can just keep it simple:
If the name already exists, we’ll make a numbered version instead:
That way, if you try renaming three nodes to diffuse, you’ll end up with:
diffusediffuse_1diffuse_2
3.3.7. Finally — Rename the node
After passing all these checks, Mari is happy, I’m happy, and the node can safely be renamed:
Name It Right!
It might feel like a lot of boilerplate, but this is one of those cases where being overly cautious pays off. You’re not just making sure the node gets renamed — you’re making sure it gets renamed reliably and won’t blow up later when Mari rejects a bad name.
I’ve walked through all the rules and checks (that I can think of) Mari expects us to respect before renaming a node. Now here’s the complete method in one piece, with inline comments so you can see why each step matters:
Quick Recap:
This method ensures that the name you give a node is:
- Stripped of extra spaces
- Lowercased for consistency
- Free of special characters
- Not reserved (like the Viewer node)
- Not empty
- Not conflicting with existing names
Only then does Mari allow the rename to happen safely.
3.3.8. Single Rename Form: Now Available in Decorative Mode!
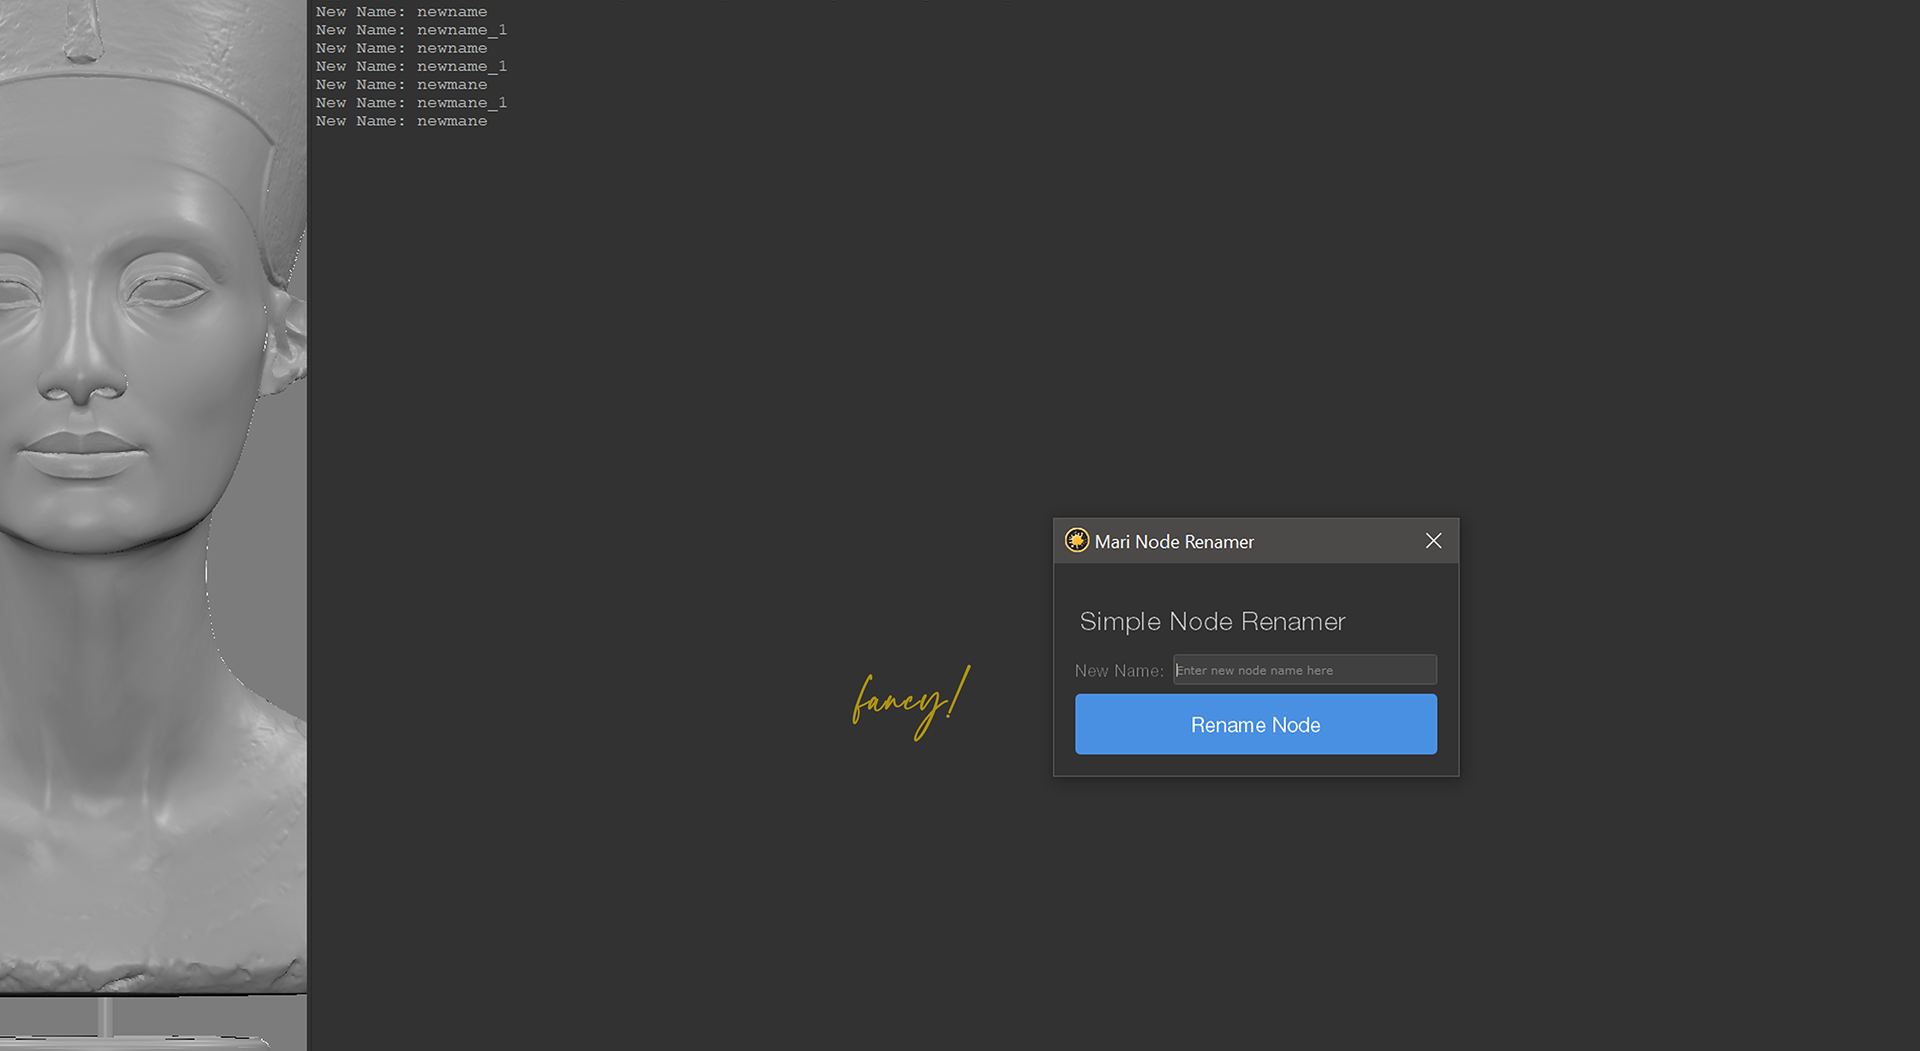
Okay, so the renamer UI is up and running… but let’s be honest: it’s looking a little plain vanilla. Functionality is great, but staring at grey rectangles all day is no fun.
setDefaults() — my tiny styling helper that makes the whole thing feel like it just came back from a spa weekend.
Here’s the method in all its minimalist glory:
What’s New?
- Titles: still elegant and airy, your top-level headers now look like they belong in a design tool, not a forms app.
- Labels: soft grey helpers that guide the eye without shouting for attention.
- Buttons: the star of the show. Love it!
- Hover: darkens slightly to say “yep, I’m fly and interactive.”
- Pressed: goes deeper blue so you feel the click visually.
So my button now has some real swagger — it no longer looks like an afterthought, like it crawled straight out of Windows 95. It looks tappable, usable, and intentional.
Why styling matters
- Clarity: Buttons stand out as clear “action points” now.
- Feedback: Hover/pressed styles give users instant response — no second guessing whether they clicked or not.
- Vibes: Let’s be honest… a polished button makes your whole UI feel more legit. It tells the user “yes, this is a tool built by a designer.”
What Next?
Now that I’ve handled renaming a single node, its time to turn things up a bit:
- What if you want to rename multiple nodes at once?
- What if some names clash and need auto-numbering (
_1,_2,_3)? - What if you want to apply distinct names to different nodes in bulk?
That’s where things get a little more interesting — and that’s exactly what we’ll tackle in the next section.
4. One Giant Leap for Node Kind!
Previously, I managed to get Mari to happily (and safely) rename a single node without throwing a hissy-fit. Stripped the spaces, lowercased the letters, kicked out special characters it didn’t like, and even made sure no two nodes ended up fighting over the same name. That was the “small step” — cautious, deliberate, and full of guardrails.
But now… I’m cranking shit up?
So far, I’ve only been dealing with one lonely node at a time — but what happens when there is a whole lineup waiting for a makeover?
Here’s where things got interesting. Instead of a single text field, the UI now needs to scales with however many nodes are selected. That means:
- Each node gets its own row, with its old name locked on the left and a fresh new name field on the right.
- A neat little arrow button sits between them, visually connecting the dots.
- Utility buttons (focus, view, rename) ride along on each row, giving you the option to tweak names one by one if you’re feeling hands-on.
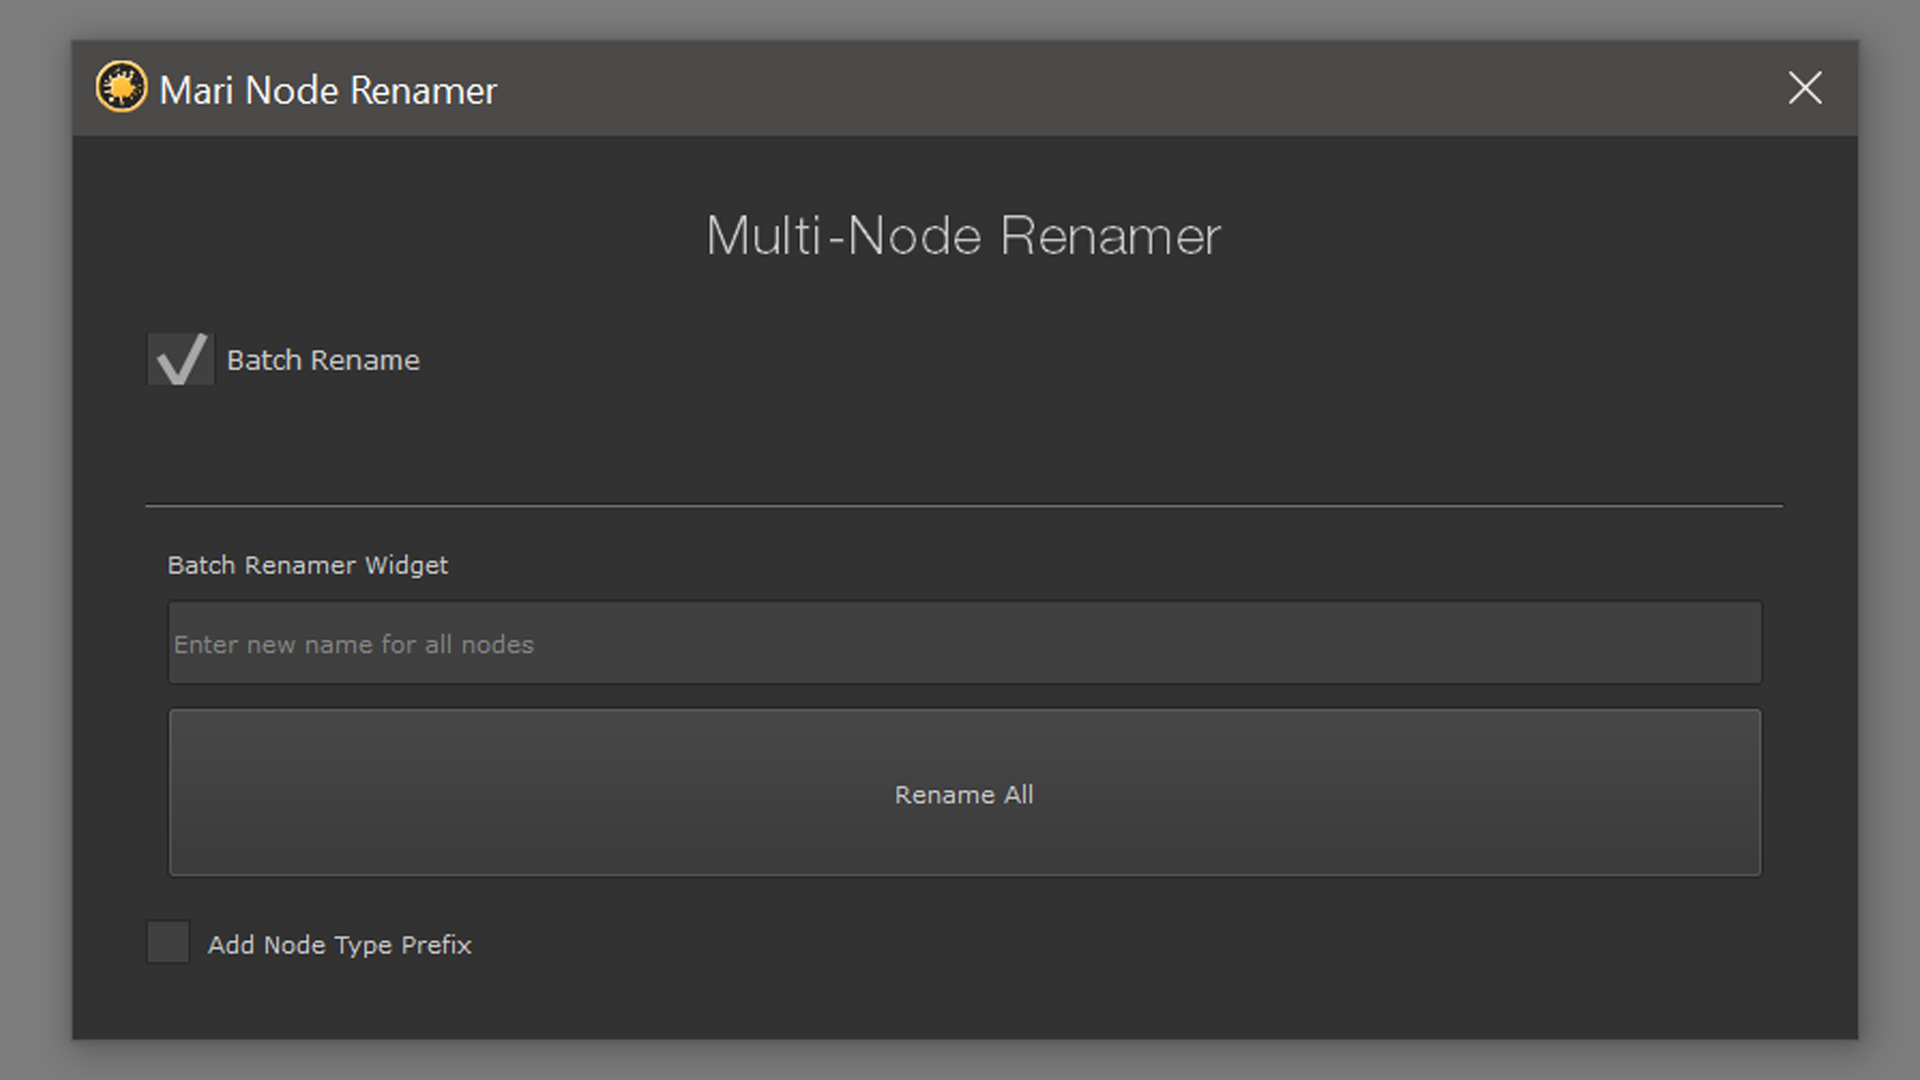
But of course, sometimes I don’t want to handcraft names for every single selected node. Sometimes I might just want to flip a switch and let the tool do the heavy lifting. That’s where the Batch Mode checkbox comes in:
- Flip it off → you’re in individual rename mode, with rows for each node and full manual control.
- Flip it on → the rows collapse into a single base-name workflow, where you can apply prefixes, suffixes, and auto-numbering in one go.
Also, thinking back I overlooked that I wanted to get fancier and incorporate the node type into the name, either as a prefix or a suffix, so you end up with something like paint_objectMask or objectMask_paint. (I’ll also address that here.)
This way, the tool doesn’t lock you into one workflow — it flexes to whatever you need in the moment. Fine-grained control when you want it, batch power when you need it.
Now because I already tucked the single-node workflow neatly into its own method, I won’t need to reinvent the wheel here. Instead, I can borrow and adapt the single-node logic, wrap the extras (batch mode, row generation, numbering) into helper methods, and keep the codebase clean, modular, and easy to extend later. I’ll move a little faster here (no need to re-explain every .strip() or .lower()), but I’ll slow down when the logic changes to handle multiple nodes at once — because that’s where things get interesting.
With that foundation set, it’s time to dive in and actually design the multi-node UI.
It’s my “giant leap” moment: I’m leaving behind the tricycle of single-node renames and strapping into the rocket of multi-node renaming.
4.1. Getting Started
Before I could start flexing my batch-renaming muscles, I needed to decide which path to take:
- Did the user select just one node? → Cool, we stick with our single-node workflow.
- Did they select multiple nodes? → Time to switch gears and spin up a different UI for bulk renaming.
That means the very first change happens back in the class where I already check the selection. Back in the constructor, I already had this little guard clause:
Now here’s the small-but-important refactor: instead of stuffing all the UI logic directly inside the constructor, I’m going to wrap each workflow into its own method. Why?
- It keeps the constructor lean and readable.
- It avoids a giant wall of code.
- It makes it easier to tweak or extend one workflow later without touching the other.
For now, here’s the structural update:
Where:
showSingleNodeUI()handles the single-node case (basically what we already built, just wrapped neatly).showMultiNodeUI()will be our new playground for batch renaming.
It’s a subtle cleanup but when the codebase starts to grow (and it will), you’ll also be glad you took the time to organize things this way.
Better still, with our branching logic in place, I went ahead and wrapped both workflows into their own methods:
This makes the constructor far cleaner and shifts the responsibility of building the UI into showSingleNodeRenamerUI().
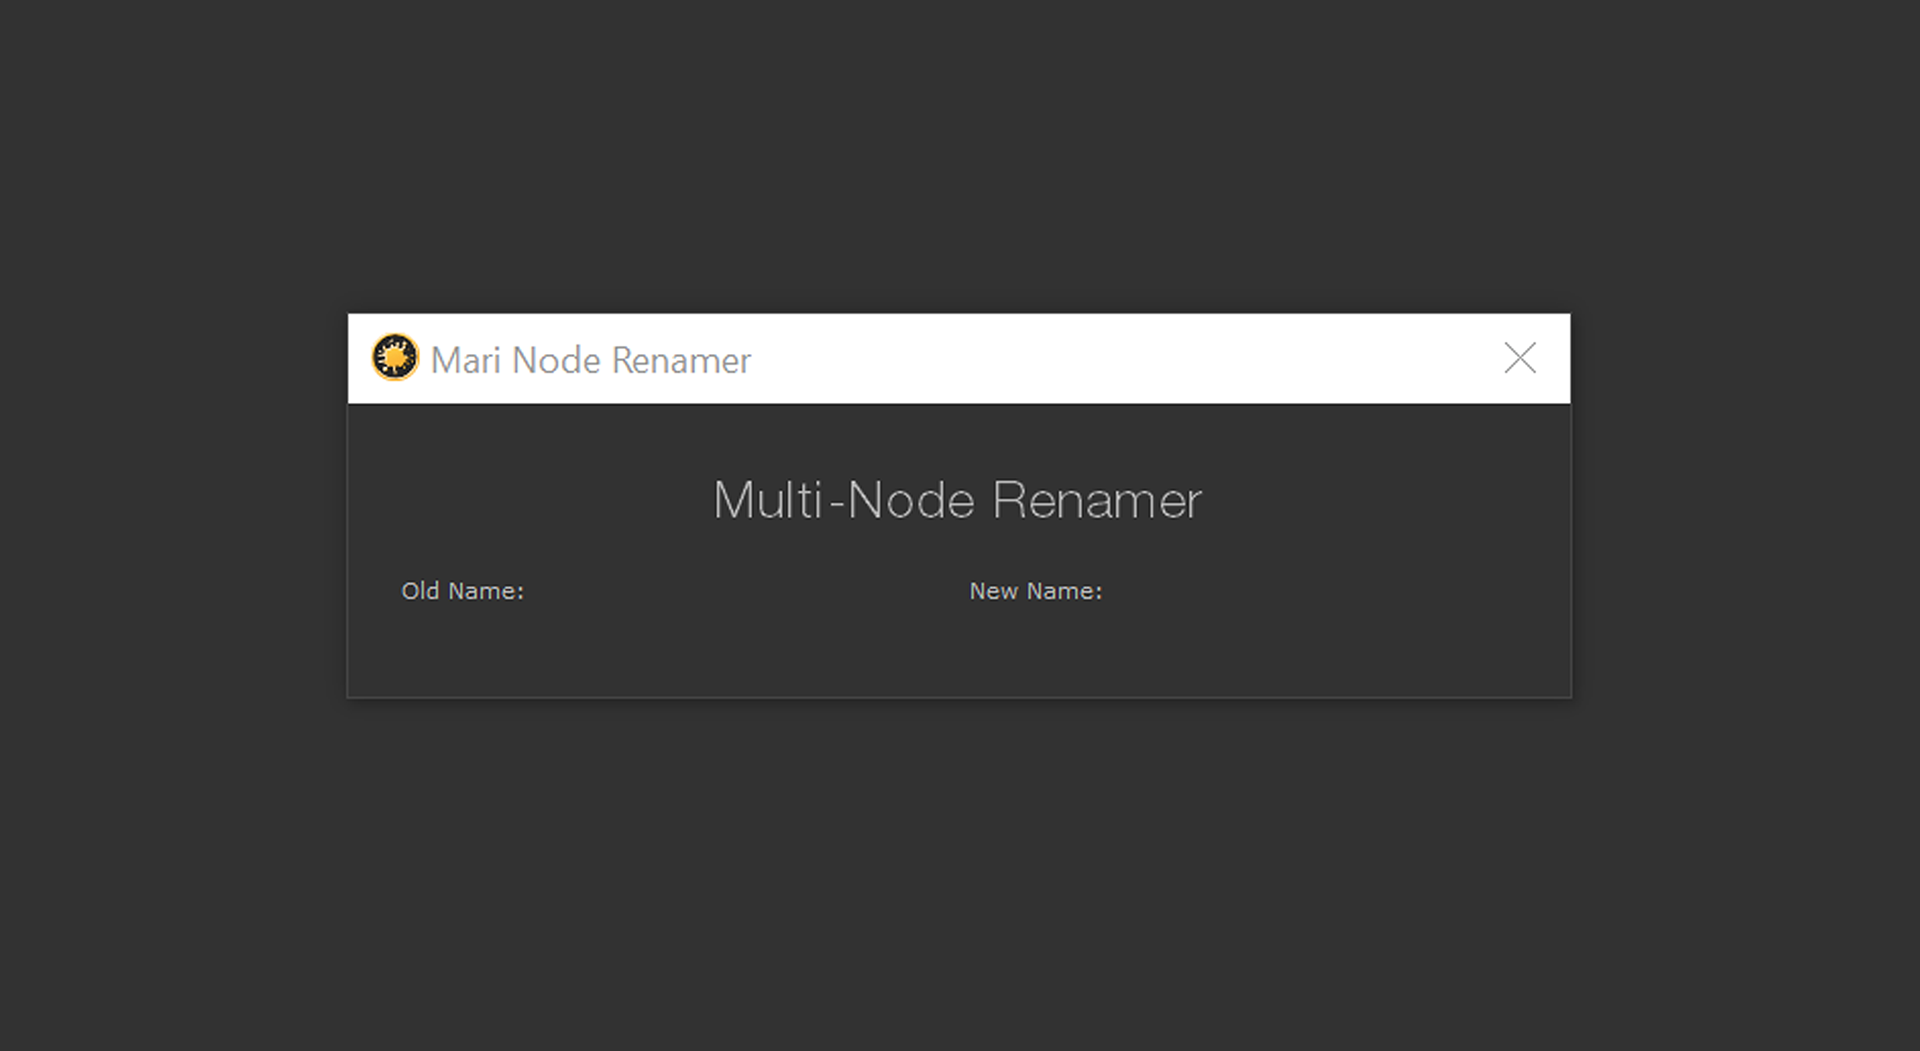
Inside that method, I built a compact layout with three rows:
- Title row: A centered label reading “Simple Node Renamer.”
- Input row: A
QLabel(“New Name:”) and aQLineEditwhere the user types the new name. - Action row: A big, friendly
QPushButton(“Rename Node”), wired up to ourrenameSingleNodemethod usingfunctools.partial.
Here’s what it looks like in simplified form:
And the class:
Quick Note
Right now, showSingleNodeRenamerUI() is just building the UI elements but not giving anything back. That’s fine for testing, but in most cases, when you write a function you’ll want it to return an object or variable you can reuse later. So, eventually, I’ll update this method so that it actually returns a UI object — which I can then plug into the rest of the interface
4.2. Amuse-bouche
Both the single-node and multi-node UIs share a common element: a title section. Instead of duplicating that setup in two different places, I refactored the title creation into its own helper method. That way, I can simply pass in a string and get back a ready-made, consistently styled title block for whichever workflow is active.
And here’s how I’m plugging it into the multi-node UI:
Now, this might look like a small improvement — just a refactor of a repeating pattern. But the real payoff is about to come.
Because in the next step, we’re not just dealing with one input field like before. Instead, we’ll need to:
- Dynamically create an input field for each node selected.
- Add a dedicated rename button for each row, so that clicking it renames just that node.
- Capture the text from the specific field connected to the button — without mixing it up with the others.
4.2.1 Refactor Time: Returning UI Objects Before Things Get Messy
At this point I decided to refactor both methods so they return a UI object (vl_renamer) that I can simply drop into the main layout. Why? Because things are only going to get more complex from here, and I’d rather keep the code clean and modular before it starts getting really messy!
So instead of having each method directly build onto the UI, they now just package up a neat little layout object for me so I can just “grab-and-go”.
Here’s the updated showSingleNodeRenamerUI():
And for when multiple nodes are selected:
Note on self
You’ll notice I ditched adding things directly to self inside these methods. Why?
Because the whole point of this refactor is to make these methods return a ready-to-use UI object (vl_renamer). Instead of polluting the class with every tiny widget or layout, I just build the mini-UI, return it, and let the main class decide where it goes. Cleaner, leaner, easier to reason about.
4.2.2 Plugging it into the Main UI
Now the main window doesn’t care how the single/multi renamer is built — it just takes the final object and drops it into place:
4.3. Entrée: À la Carte or Buffet?
Before I get going on individual rename row fields, I have to decided on how users(me) will handle multiple nodes. Do we want them to rename each node individually or rename everything in one go?
That’s where a Batch Mode checkbox comes in.
4.3.1. Where should it live?
Because batch mode is a global setting, the checkbox should appear near the top of the multi-node renamer — just under the title. This makes it obvious that you’re toggling between two modes of interaction:
- Batch Mode Off (default): All individual node rows are visible. You can rename each node one by one.
- Batch Mode On: The individual rows disappear (or get greyed out, if you want to remind users they’re still there). Instead, you’ll see a single input field and rename button that applies your chosen name pattern to all selected nodes.
This approach makes the workflow crystal clear: either rename nodes individually or flip the switch and handle them all together.
4.3.2 Hide or Grey Out?
There are two ways I could handle the UI when batch mode is active:
- Hide the rows: Keeps the interface clean and makes it obvious you’re in a different mode.
- Grey out the rows: Shows what you’re not using, which could help users remember they can toggle back.
Personally, I went go with hiding the rows — it feels like it would be tidier and avoids confusion. And I can even add a small message like “Individual rename fields are hidden while batch mode is active” for extra clarity.
By introducing this toggle now, I’m setting up a neat division of responsibilities:
- The row-by-row UI handles the fine-grained renaming (powered by the same
renameSingleNodelogic we already built). - The batch mode UI will unlock prefix/suffix handling and auto-numbering, which we’ll get to in the next step.
But wait, plot twist… A gap in my knowledge and AI to the rescue
4.3.3. Side Dish Surprise: When Layouts Refuse to Appear/Disappear..
All was going well… until I realized that my clever plan to hide the individual rename rows when Batch Mode was enabled wasn’t going to work the way I imagined.
I had initially wrapped the rename rows in a QHBoxLayout, hoping that I could control the visibility of this object depending on the mode I was in, single of batch mode. This, I came to learn, wouldn’t work!
Why? Because Qt layouts aren’t widgets. Why is this important?
Layouts vs. Widgets
In PyQt/PySide, a QHBoxLayout or QVBoxLayout is only responsible for arranging child widgets — not for acting like a widget itself. That means layouts don’t have handy methods like .setVisible() or .hide(). They’re more like invisible managers than actual UI elements.
So if you try something like:
…Qt will just laugh at you (quietly, but you’ll feel it).
The Fix: Wrap Layouts in a Widget Container
To control visibility, you need a widget container — something that can actually be shown, hidden, or greyed out. Enter QWidget .
Instead of applying the layout directly to the window, you wrap it in a QWidget like this:
Now, container is a proper widget, and you can freely call:
to hide everything inside.
This also means that if we want to toggle the row-by-row rename UI on and off when batch mode is checked, we’ll need to wrap those layouts in their own dedicated containers. That way, they can be cleanly hidden or shown depending on which mode is active.
This was the first real “structural shift” in the UI design. I had to go back and rethink how I grouped things: layouts for arranging widgets for visibility control.(Awesome! I love repeating task over and over!)
Think of it like serving a meal: the plate (QWidget) is what goes on the table, and the arrangement (QVBoxLayout/QHBoxLayout) is how the food is placed on it. You can hide the plate — but you can’t make just the arrangement vanish into thin air.
The QGridLayout Gotcha
QGridLayout GotchaNow that my showMultiNodeRenamerUI is returning a widget, rather than a layout, when I first swapped my QVBoxLayout-based setup into a QGridLayout, I ran into this error:
For example:
Why?
Unlike QVBoxLayout and QHBoxLayout (which just stack items automatically), a QGridLayout is like a table — it needs to know the cell coordinates to place things… Si, I am going to go maaaad!
The Fix . . . Again
Instead of trying to add a bare layout to the grid, the cleaner solution was to:
- Wrap your entire renamer UI into a
QWidget. - Add that widget to the grid with
.addWidget().
That way, I didn’t have to micromanage layout coordinates for every sub-layout.
Refactored showMultiNodeRenamerUI
Now instead of returning a bare layout, I have self-contained widget (containerWidget) which holds the layout. This means I can:
- Call
containerWidget.hide()orcontainerWidget.show()to toggle the entire renamer UI. - Keep the UI modular — it behaves like a component you can drop anywhere in the main interface.
- Expand later with additional UI controls or decorations around the layout (since it’s a widget, not just a layout).
Refactored showSingleNodeRenamerUI
So, here’s the thing: technically, my Single Node Renamer didn’t need the same widget-wrapper treatment. Since it’s always just one form, and I wasn’t planning to toggle it on/off dynamically, the plain layout version worked just fine.
But… for the sake of consistency (and future sanity), I refactored it anyway. Because let’s be real: future me is lazy, and I don’t want to remember which UI returns a layout and which one returns a widget.
Here’s the new version:
Sure, the single-node UI didn’t technically need this refactor… but now both my Single and Multi renamers behave the same way. Which means when I’m adding features later (say, hiding, swapping, styling), I won’t have to stop and wonder: “Wait, is this one a layout or a widget?”
Answer: they’re both widgets. Future me says thank you.
Updated __init__
So, remember how originally my showSingleNodeRenamerUI() and showMultiNodeRenamerUI() methods returned layouts? Back then, it made perfect sense to just do:
Given that now both methods return a QWidget (with its own layout inside), not just a naked layout, QGridLayout.addLayout() only works with layouts, duh; If I try passing it a widget, PySide2 throws a “wrong overload” error – whatever that is…
So, addWidget() instead. Because a grid is perfectly happy to host a QWidget in a cell.
Here’s the updated __init__ with the change highlighted:
Hallelujah! With these changes:
showMultiNodeRenamerUIreturns a widget (container) instead of a naked layout.__init__adds that widget into theQGridLayoutusing.addWidget().- No more cryptic
addLayouterror. - And now I can create a checkbox layouts that can control the visibility of the MultiNodeRenamer and BatchRenamer widgets… so maybe I should do that next
Now that I know I need to wrap containers with widgets in order to control their visibility, I’ll create dedicated widget containers for the batch mode checkbox, the multi-renamer UI, and the batch mode UI.
I’ll then add all of them to the main container layout. And just to make sure I’m not drifting into another “dream within a dream”, I’ll perform a quick check by dropping in placeholder QLabels for each section, and adding a temporary border around each for my sanity:
And because they’re wrapped inQWidgets, you I now fully control their visibility via a setVisible(True/False) toggle.
The hl_checkbox.addStretch() call makes sure the checkbox stays left-aligned, while still allowing the layout to flex if I want to add more controls in the same row later.
Now that that’s done, I can safely put the batch checkbox in its place! Since I’ll eventually need to hook its state up to control visibility, I’m keeping a reference to it on self.
At this point, I can actually click the checkbox, but it doesn’t do anything yet — that comes in the next step when I connect it to hide/show the Multi-Renamer UI and Batch Renamer UI.
It’s Stretchy!
A quick little aside — I was going nuts trying to figure out why my widgets were stretching and contracting like crazy whenever I resized the window. To debug it, I slapped a border on everything:
Now when I ran the UI, I could clearly see each widget outlined, and how they expanded/contracted with the window size. That behavior was driving me nuts — but after some Googling… you know how it goes..

The fix? Spacers.
That’s exactly what spacers (with expanding size policies) are meant for in Qt. If you want your main widgets to stay “stable” while the extra space is absorbed by something invisible, you just add a spacer at the end of your layout.
You can do it explicitly with a dummy widget:
Or, use the lightweight one-liner:

Both do the same thing. The addStretch() version is cleaner, while the QWidget version is nice if you want to be more explicit.
Notice I’m storing them as self.batchModeCheckbox and self.prefixCheckbox.
That way, later we can do, or something of the sort..(I still thinking through my options):
4.3.4. Hooking up the toggle logic
Like I found out earlier, layouts (QVBoxLayout, QHBoxLayout) can’t be hidden directly. You can’t just call .hide() on a layout. Instead, you need to wrap the layout inside a QWidget, and that wrapper can be shown or hidden as needed.
That’s why I had to do this first:
Now multi_renamer_widget behaves like a normal widget — I can call .hide() or .show() on it.
With that in place, I wired up the Batch Mode checkbox like this
Some Notes
- Initial State
By default, I want the “normal” renamer to be visible and the batch version hidden. That’s why I explicitly call:
This ensures the UI comes up in single-node mode first
Why define toggleBatchMode inside the function?
Notice I didn’t make toggleBatchMode a method on the whole class. Instead, I just defined it inline (nested inside my UI-building function). Why?
- It’s a local helper, not something I’ll ever call from elsewhere.
- Keeping it here makes the logic self-contained and easier to read later.
- It also has access to the local widget variables (
multi_renamer_widget,batchRenamer_widget) without me having to stash them onself.
By default, I want the “normal” renamer to be visible and the batch version hidden. That’s why I explicitly call:
self.adjustSize()
This is a nice little touch up: when I hide or show a block of UI, I want the window to resize to fit the currently visible widgets, instead of leaving a big blank hole. Calling adjustSize() on the parent widget does exactly that.
4.4. The Prefix Issue
While I am dealing with check boxes, I may as well deal with the prefix checkbox.
4.4.1. The Obvious Way
I was going to add the prefix checkbox to both modes like this :
Boring! Right. Basically, repeating the same code in both modes, I might as well name the nodes by hand if the goal is repetition!
It does works but it’s too obvious and changing one means I’d have to change the other..i.e meh.
4.4.2. The “Cooler” Way
Instead, I decided to try be a bit smarter.
The idea is to create one prefix checkbox and simply move it between the two layouts depending on which mode you’re in. And since I have been yapping on and on about making the UI modular and flexible, this shouldn’t be that difficult.
And wouldn’t you know it; I already have a pre-made function to toggle between the two modes!
Step.1 Create one Checkbox (not two!)
Step 2: Add placeholder layouts in both UIs
These are just empty layout slots where the checkbox can “live.”
Step 3: Set the initial state
The UI is initially in single mode; the checkbox should initially live in this UI:
Step 4: Move the checkbox when toggling modes
Since toggleBatchMode() is responsible for adjusting the UI, it makes sense that moving-the-checkbox functionality should live here as well:
Side Note: .setVisible() vs .show() / .hide()
At one point I ran into a really odd bug: my UI wouldn’t resize when I switched between the multi-node renamer and the new batch mode.
I was originally doing this:
…but the window just sat there stubbornly, not adjusting its size.
The fix turned out to be replacing those calls with:
So what’s the difference? Aren’t they the same thing?
Not quite. Here’s the deal:
.setVisible(True/False)only flips the widget’s internalvisibleflag. It doesn’t always notify the parent layout that geometry has changed. So the widgets disappeared, but the layout still acted as if they were there → no resize..show()and.hide()are higher-level helpers that not only toggle visibility, but also sendQShowEvent/QHideEvent. That’s what tells Qt’s layout system: “hey, recompute everything, the window needs to resize like right now.”
That’s why my window was stuck at the old size — the layout simply wasn’t being told to recalc.
Moral of the story: if you’re working with layouts and want things to resize nicely, use .show() and .hide(), not .setVisible().

Why this is better
- Only one checkbox exists: Its state (checked/unchecked) is always preserved regardless of the whatever mode I am in…
- No duplicate code: Change the label, tooltip, or default state once, and you’re done.
- Feels natural: To the user, it just looks like the checkbox belongs in whichever mode is active.
To the eye, it looks exactly the same… In reality, we’re just moving the same widget around under the hood, keeping things clean (less repeation yourself) and keeps the UI feeling clean.
4.5 The Buffet
With the UI outer frame looking good, it’s time to work on the Batch Renamer UI. Thankfully, the structure is almost identical to the singleNodeRenamerUI — one row for the text field, one row for the action button. Easy win.
Here’s the setup:
4.6. À la Carte
Before I get to the meat and potatoes of this tool, the next step is to first sketch out the outer structure of the multi-node UI.
4.6.1. Serving Up the Node Rows
After plating the amuse-bouche, and opting out of the buffet option, then it’s time to bring out the entree. This is where the UI finally becomes interactive, letting you rename each selected node right from its own row.
Continuing with my setup of showMultiNodeRenamerUI()
Nothing “functional” happens yet — we’re just laying out the columns and containers:
- A labels row at the top (“Old Name” | “New Name”).
- A vertical layout (
vl_nodeFields) that will eventually hold a row per node. - The placeholder
for node in self.selectedNodeList:where the real action will live.
This gives us a clean, grid-like framework so that when we add the per-node fields and rename buttons, everything will align nicely without needing to re-engineer the structure.
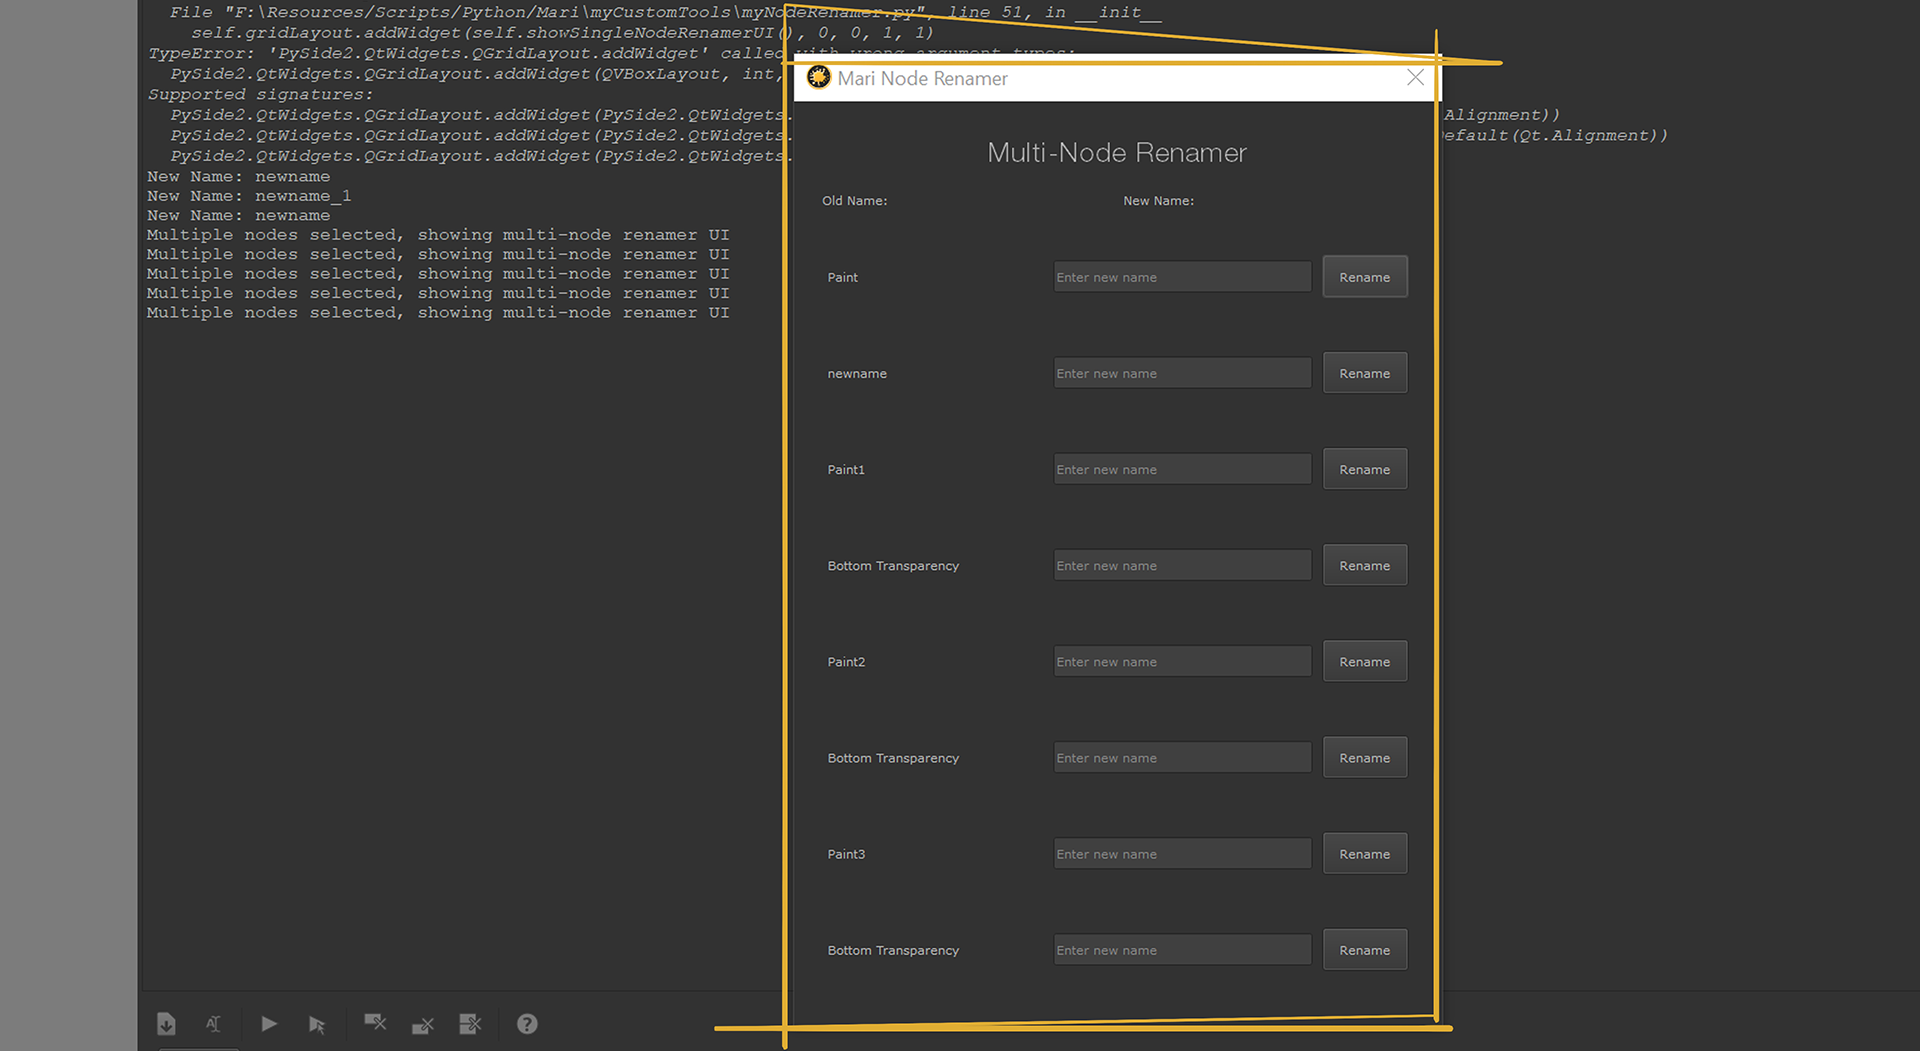
Now in the for loop I wrote earlier, where I was to get things done, all I need to do is create a row factory method for each selected node:
Each call to createRenameField() returns a horizontal row layout that I can stack into the vertical column.
That function:
Why this works quite nicely!
- Reusability at its best → Notice that we didn’t need to reinvent the renaming wheel here. Each row is just renaming one node, so it makes perfect sense to reuse our
renameSingleNode()function from earlier. By usingfunctools.partial, the rename button in each row is automatically “wired up” to the correct node and its corresponding text field. - Clean structure → Every row contains exactly three ingredients:
- Old Name (a fixed label)
- New Name (a text box)
- Rename (a button)
That’s it — no mess, no fuss.
- Scalable by design → Because rows are generated dynamically from the node list, the UI gracefully handles any number of selected nodes. Two nodes? Two rows. Ten nodes? Ten rows.
With this, the table is fully set I can garnish the dish with some extra UX seasoning — maybe spacing, alignment, or even batch rename options to complement the single-row buttons.
4.6.2. Row-mance in the Grid: how we stopped our multi-node UI from drifting
When I first threw together the multi-node renamer, it looked fine: a header row (“Old Name | New Name”) and then a bunch of rows below built with QHBoxLayouts.
Then I added one extra button after the Old Name, and… the header no longer lined up with the fields. The “New Name” label sat above…a button.
Even now, the image above the “NewName: title does not align well with the respective lineEdit fields.
As soon as I added anything between the Old Name and the New Name (e.g., “More/Duplicate/Delete”), the header no longer mirrors the structure of each row.
4.6.2.1 The “Before” (why it drfited)
The layout strategy was all off!. Stacking HBoxes and VBoxes is great for simple forms, but they don’t enforce columns. As soon as one row has “Old Name + [More buttons] + New Name”, while the header only has “Old Name | New Name”, the alignment drifts.
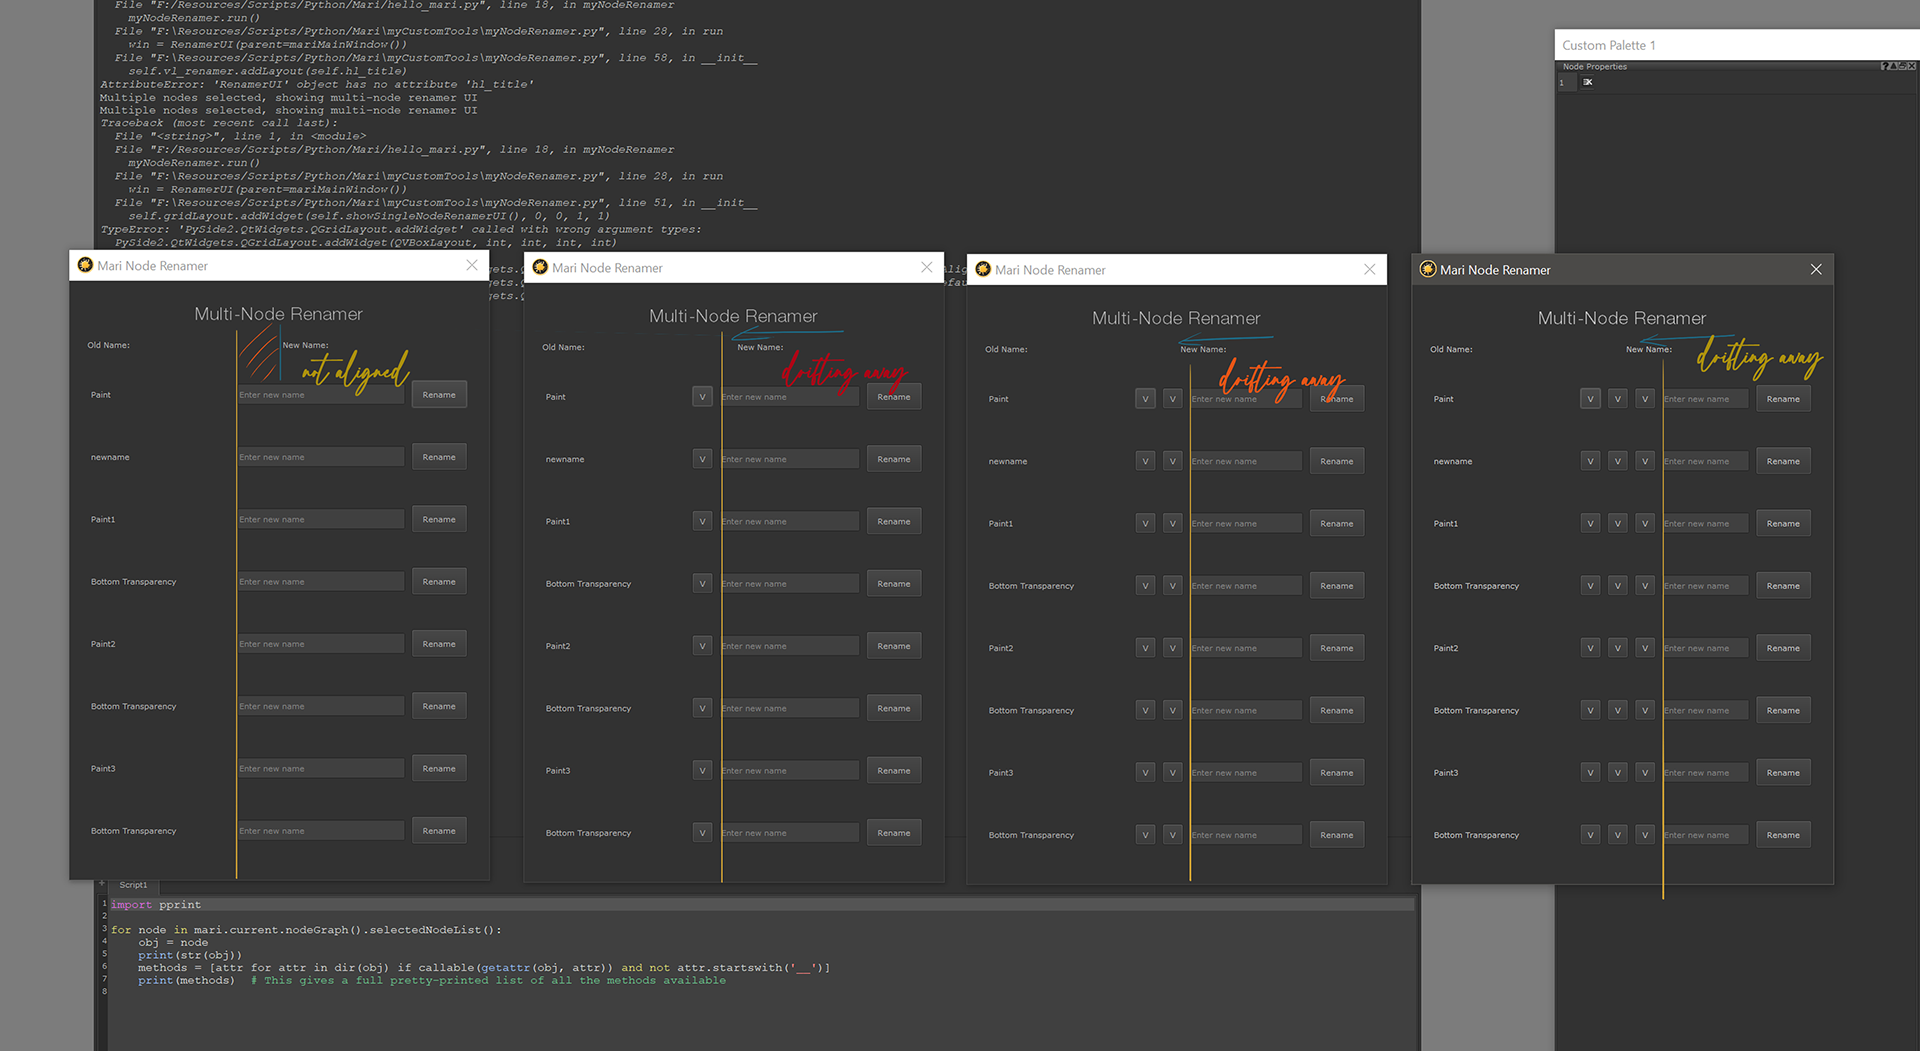
It was time to graduate to a proper column-aware layout.
4.6.2.2 The Fix: Build a real grid
We’ll put the whole section into a QGridLayout with explicit columns:
Col 0 → Old Name
Col 1 → Actions (can hold multiple buttons)
Col 2 → New Name (QLineEdit)
Col 3 → Spacer (so things breathe / push button right)
Col 4 → Rename button
Because every row (including the header) uses the same columns, alignment is bulletproof—no matter how many buttons I choose to drop in.
4.6.2.3 Header + grid setup
4.6.2.4 Row builder (refactored)
Instead of returning a single QHBoxLayout, each row drops its widgets directly into the grid at a given row index. This keeps the code modular and lets you add as many action buttons as you like without breaking alignment.
Little polish moves that make a big difference
- Fixed-width old-name column:
label.setFixedWidth(150)guarantees perfect column alignment no matter how long the node names are. - Expanding new-name field:
lineEdit.setSizePolicy(QSizePolicy.Expanding, QSizePolicy.Fixed)lets the QLineEdit breathe as the window grows. - Button alignment: a dedicated spacer column (or
setColumnStretch) pushes the Rename button flush to the right, consistently across rows. - Multiple actions per row: place buttons in a small
QHBoxLayout, wrap it in aQWidget, drop that widget into column 1. Add/remove buttons freely without touching the rest of the layout. - Keep the rename logic you already wrote: we still pass the line edit widget to
renameSingleNode; inside that method you call.text()to get the current user input. No need to duplicate logic just because we’re in the multi-node view.
4.6.2.5 Putting it together
Alright, so here’s where I’m at: I now have a solid, good-looking UI. It has labels, fields, buttons, even some neat toggling magic. It looks like it could rename a thousand nodes with a single click.
…except it doesn’t. Right now, it’s basically a very stylish cardboard cutout.
The main event — the whole reason I’ve been building this thing — is still missing: actually renaming the nodes.
That’s the next step. Time to wire up the buttons, grab those input fields, and finally make Mari do the work for us. Enough decorating let’s get cracking!
4.3.2.6 Where we’re headed next
Now that the grid is rock-solid and scalable, we can wire up those Actions:
More: open a mini panel or context menu
Duplicate: dupe the node and prefill the new name
Delete: quick remove (with a safety prompt)
Find/Focus: center the node in the nodegraph (super handy before renaming)
And of course, we’ll keep the Batch Mode path we set up earlier (base name + optional prefix/suffix + auto-numbering) for those “rename the whole lineup” moments.
5. From Pretty UI to Actual Work
Up to now, we’ve been busy building out a UI that looks good, feels good, and could almost trick someone into thinking it does something. Titles, labels, buttons, toggles — check. A smooth layout that adjusts on the fly — check. Styling so clean it could pass for a designer’s prototype — check.
But here’s the thing: none of it actually renames nodes yet. It’s all set dressing. A very convincing set, sure, but still just a stage without a play.
This section is where we start adding the logic behind the buttons. The magic that takes a line edit’s text and transforms it into a shiny new node name in Mari. The “why we’re here” moment.
It’s time to actually feast on this meal!
So much for the preliminaries,
and now on to the main event!
Hades, Hercules
5.1. The Plan
Before diving into code, here’s the rough roadmap for how this will go, not too different from what I did with renameSingleNode(). Infact I will use this very same methods to rename the nodes:
- Single Node Rename Logic
- Grab the text from the
lineEdit_singleNodefield. - If the field isn’t empty, send that text off to actually rename the selected node.
- If it is empty, throw a warning (because renaming everything to “nothing” wouldn’t be very helpful).
- Grab the text from the
- Multi-Node Rename Logic
- This one might be trickier: each row in the grid has its own line edit.
- Might need to loop through all those rows, check what’s been typed in, and apply the renames to the corresponding nodes. But maybe not as each row has it’s own rename button..hmm
- Bonus: if the field is empty, leave that node alone.
- Batch Mode Rename Logic
- Here the user types one name, and every selected node gets that name — likely with a numerical suffix (
Node_01,Node_02, etc.). - Nice and efficient when you’re renaming a group in one sweep.
- Here the user types one name, and every selected node gets that name — likely with a numerical suffix (
- Prefix / Suffix Support
- Remember our friendly little prefix checkbox? This is where it finally comes into play.
- If checked, whatever prefix the user sets will get added to the new names.
- Wire It All Together
- Each “Rename” button already exists in the UI.
- Now, we’ll connect them to their respective logic functions (
renameSingleNode,renameMultiNodes,renameBatchNodes).
- Action/Utility Buttons
- So the user can find the node in the NodeGraph
- Focus on the node being renamed, display its parameters without having to double click on the node
- Delete the node from the NodeGraph e.t.c
I’ve still quite a bit to get done!
5.2. Adding Prefix Options & Smarter Single Node Logic
I suppose the first thing is to update renameSingleNode().
At the moment it doesn’t know what to do with prefixes and it cannot tell if I am renaming one node or multiple nodes.
Specifically I wanted to make sure the single-node renamer behaves correctly no matter what’s selected.
First up: the UI update. In showSingleNodeRenamerUI() I added a prefix checkbox, just like in multi-mode. Nothing too fancy — it sits under the name field, and if ticked, we’ll prepend a prefix based on the node’s type. Here’s the updated section:
Now that means our renameSingleNode() function also needs to accept the prefix logic. But before we get there, I had to give the class a sense of mode awareness. When the UI is built in __init__, I set a renameMode flag depending on how many nodes are selected:
This way, when renameSingleNode() runs, it knows which checkbox to look at (single or multi). No need to hunt through the UI with findChildren or accidentally reference a widget that doesn’t exist.
Prefix handling then looks like this:
And finally — a small but important fix. While testing, I noticed that if the UI was left open and I changed my selection in Mari, the rename button wouldn’t affect the new node. That’s because the selected node was locked in when the UI was first built.
The fix: each time the rename button is pressed, refresh the selection. For single-node mode, this means checking Mari again and validating the selection:
This way, the renamer isn’t stuck on the first thing you clicked — you can keep the window open and rename nodes on the fly.
5.3. Multi-Node Rename Logic
With that done, I can now proceed to multi-node mode.
And here’s the funny part: it’s not really its own big, scary function at all… it’s just calling the renameSingleNode() method for each row. That’s it.
So in practice, renameMultiNodes() is just a polite little loop that says:
“Hey, for each node and its corresponding text field, pass them over to renameSingleNode() and let it do the heavy lifting.”
Which means:  prefix logic is already handled, empty fields can be skipped, no duplication of code. It’s basically a gimme.
And honestly, I thought this was going to be the tricky part. But nope — Python just lets you elegantly reuse the logic you’ve already built. How cool is that?
5.4. Batch Mode Rename Logic
Turns out this was the trickier situation. Renaming one node is easy. Renaming a bunch of them at once? That’s where things got messy. I suddenly had to worry about:
- Making sure each node name was unique (which wasn’t a new problem, but I had to rethink my approach.
- Only adding counters when they were actually needed (no aggressive
_01,_02if the names were already unique). - Keeping the whole thing readable.
So, instead of trying to twist my existing renameSingleNode() into doing gymnastics, I decided to keep my life simple: write two new methods for batch renaming. That way I can keep the logic clear and know exactly which function handles which mode
5.4.1 Hooking Up the Button
In my showMultiNodeRenamerUI(), I hooked up the “Rename All” button to a new batch method:
That way, hitting the button kicks off the dedicated batch renaming process, no shared logic headaches.
5.4.2 The Batch Renaming Code
Here’s the actual new method:
And to validate the name:
What’s With the Double Underscores?
Sharp-eyed Pythonistas might’ve noticed I’m prefixing some methods with double underscores, like __validateName() and __renameAllNodes(). That’s not a typo, it’s intentional.
In Python, leading double underscores trigger name mangling. This means that instead of being directly accessible as obj.__validateName, the method actually gets stored internally with a class-specific name (e.g. _RenamerUI__validateName).
Why bother?
- It discourages accidental calls from outside the class.
- Keeps these methods “private” to my renamer logic, since they’re really just helper functions.
- It makes the code easier to read at a glance — you can tell immediately which methods are internal plumbing versus which ones are part of the intended “public API” of the class.
So while Python doesn’t have strict access modifiers like private in C++/Java, this is the Pythonic way of saying:
What’s Name Mangling in Python?
When you start a method (or attribute) name with two leading underscores (e.g. __renameAllNodes), Python doesn’t just leave it as-is. Behind the scenes, it rewrites the name to include the class name in front of it.
If you look at the object in memory (dir(obj)), you won’t see __renameAllNodes sitting there. Instead, you’ll see something like:
Python mangled the method name into _RenamerUI__renameAllNodes.
This means if you try:
❌ You’ll get an AttributeError.
But if you (very intentionally) try:
✅ It works.
Why does Python do this?
It’s not about true privacy (Python doesn’t enforce that). It’s more about avoiding accidental conflicts and making it harder to accidentally mess with “internal” methods.
For example, if you subclassed RenamerUI and wrote another method called __renameAllNodes, the two wouldn’t clash. Python keeps each class’s “dundered” methods safely separated by name mangling.
Why I Used It in This Project
I’m marking __renameAllNodes and __validateName with double underscores because:
- They’re helper methods — I don’t want them treated as part of the “external API” of my class.
- It signals: “Don’t call these from outside, they’re internal plumbing.”
- It also future-proofs me a bit if I subclass or expand later, avoiding accidental name collisions.
Think of it like writing “staff only” on a door — sure, someone can open it, but the sign makes it clear they shouldn’t unless they know what they’re doing
6. The Finishing Touches – Utility Buttons
With the heavy lifting of renaming done, I can now turn to the little quality-of-life features I sketched in earlier. These are the utility buttons that sit neatly in the UI and give us quick actions like focusing on a node, copying names, or refreshing the graph.
They don’t change how the renaming works — but they make using the tool way nicer. Think of them as the little polish on top of the main feature set.
6.1 Focus on Node
The first utility I tackled was the focus button.
Originally, I created the placeholder buttons like this:
Each button was just a stub — they didn’t do anything yet. To make the first one useful, I decided to turn "C" into "F" (for Focus) and wire it to an action that centers and zooms in on the selected node in the node graph.
Here’s the updated code to add the focus button:
To make this work, I updated the addSmallButton helper so it accepts an action and the target node:
And finally, here’s the actual focus logic itself:
Now when I click the “F” button, Mari centres the Node Graph on that node and zooms in slightly. It’s a small feature, but it makes navigating a big messy node graph way faster.
6.2 Open Node Properties
This one was a little funny to implement. Unlike focusing on a node, Mari doesn’t give you a neat node.openProperties() method, I mean, this feels like the most obvious think to do, but, the action lives under Mari’s internal actions system, accessible like this:
But there’s a catch — that action expects a single node to be selected. So, to make it work, I had to juggle the selection:
- Temporarily deselect all nodes.
- Select the specific node whose properties I want.
- Trigger the
Open Node Propertiesaction. - Restore the previous selection so the user’s workflow isn’t interrupted.
Here’s the code update. First, I swapped the button definition from:
to:
Then I extended the addSmallButton() helper to handle the new "openNodeProperties" action and added tooltips while I was at it:
And finally, here’s the implementation of the property-opening logic itself:
Now, clicking the “P” button will open the Node Properties panel for that node — without permanently disrupting whatever selection you had active in the graph.
Though, now that I think about it, I think I’d want to have the node that I am working on remain selected without restoring the overall selection. So, I may remove step 3 in my final code.
I can’t think of anything I would want to do with the third button just yet, so I will have to comment that section out for now. I had thought that I could I use this to delete node from the UI, however when I am working in the Node Editor, I would remove the connection first before deleting, thereby working in a non-destructive way. Then delete the nodes much much later.
7. That’s All Folks!
That’s it for now — we’ve built a neat little renamer: single-node, multi-node and batch flows, prefixing, validation, and a handful of utility buttons to make working in the nodegraph a lot smoother. It started as a sketch and turned into something you can actually put in your pipeline and use.
A few things I’m thinking about for future tweaks:
- Add an “apply all” button in multi mode that writes every populated
QLineEditin one hit (would require guarding empty fields). - Let the tool delete nodes (with safety prompts), or grey out / hide row widgets when a node no longer exists.
- Add a naming policy toggle: “always number” vs “only number on clash”.
- Extra niceties: per-action color coding, icon-only utility buttons, or a small preferences panel for default behaviors.
This project will keep evolving as I use it and notice little pain points — that’s the whole joy of tooling: it starts useful, then improves into indispensable.
Get the full code (and why I hope you don’t just copy-paste it)
You can grab the full script from the repo/download link here:
[Download the full Renamer code — links go here]
That said — it’s waaay more fun (and educational) to build this step-by-step, just like we did in the post. Working through each section helps you:
- Understand why certain layout choices were made (wrapping layouts in a
QWidget, grid vs HBox/VBox), - Spot edge cases (selection changes, viewer node restrictions, invalid characters),
- Learn how the small utilities integrate into the workflow (focus, open properties, etc.), and
- Make the code your own — you’ll inevitably want to tweak sizes, labels, or behaviors for your studio.
If you do want to download and run the full file straight away, I’ll link it here — otherwise, follow the guide and assemble it piece by piece. You’ll learn more, and you’ll have a nicer time debugging.
Install / Usage
If you’re wondering how to actually drop this into Mari and run it — I already wrote a short guide on that. You can check it out here:
[Link to your “install / usage in Mari” post]
Final Notes
Since the earlier drafts, I’ve gone back and refactored a few bits:
- Wrapped more layouts in widgets for consistency.
- Added better styles for labels, line edits, and the new utility buttons so the whole thing looks fly.
- Tightened some logic so renaming works cleaner and names stay unique without going counter-crazy.
And with that — I’ll call this project done (for now). On to the next one!
[addtoany]
Recent
-
1
-
2
-
3
-
4
-
5
-
6
-
7
-
8
-
9
-
10
